Showing posts with label easy. Show all posts

Sunday, July 22, 2012

Poblano Cauliflower Gratin

Cauliflower is one of those vegetables that is either loved or hated.  Myself, I love it.  I usually toss some in a steam basket then toss with butter, salt and pepper and I'm happy.  So, when I come across a recipe for cauliflower that lets me take it a little further I'm all over it.

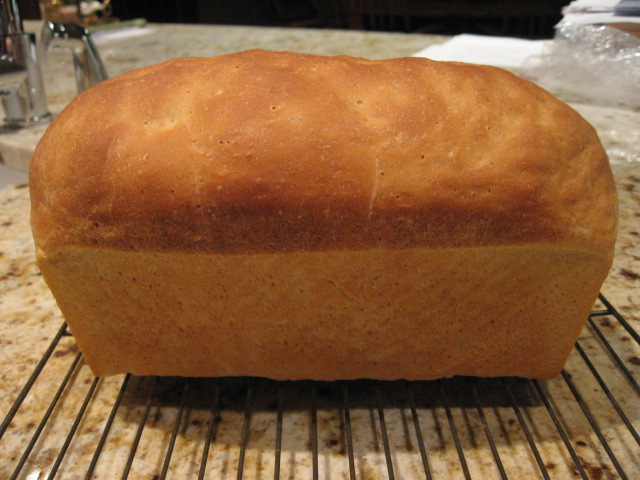
I found the recipe on Rick Bayless' website and selected it to share for I Heart Cooking Clubs July Potluck.  I really liked the ingredients in this recipe.


Cauliflower, poblanos, cream, cheese, butter, and shallots.


I would put the recipe in the easy category.  You'll get to practice some basic kitchen techniques like blanching the cauliflower and roasting peppers.  I like to roast mine right over an open flame on the range top.  Get them nice and blistered on all sides.


Once they are nice and charred, I put them in a plastic bag, close it and let them be for about 10 to 15 minutes.  They'll steam which will make them easier to peel.  The skin should slide right off.


Once peeled and seeded (please wear food gloves for this) you'll pureé in the food processor until it's smooth.  This is going to be a great part of the sauce and it's such a beautiful green!


To get the sauce started you sauté the shallots


Make a roux by adding the flour.  Be sure to cook the flour for a couple of minutes so the sauce doesn't have a doughy flavor.


You'll slowly add the cream (I like to warm my cream first) and whisk it in until it's smooth.  Then, stir in your cheese.  This recipe called for a Mexican queso anejo but I could not find that specific cheese.  Rick mentions that you can substitute with Romano or Parmesan.  I used Parmesan.


Lastly, stir in your Poblano pureé.


Slowly let it return to a boil and continue stirring until the sauce thickens.  Remove it from the heat and add the salt.


Gently fold the sauce into the blanched, cooled and dried cauliflower florets.


Pour all into a lightly greased casserole and sprinkle with a topping made of chopped almonds (I used blanched), panko crumbs and a little olive oil.


Bake in a 400° F. oven for 15 to 20 minutes until bubbly and the topping has browned nicely.  When you take it out of the oven you get to sprinkle the top with extra grated cheese.  Yum.


The gratin turned out to be creamy with a crunchy topping thanks to the panko and almonds.  The hint of poblano put it over the top. 

Rick suggests, and I would agree, that this would make a great dish to take to a potluck dinner because you can make it ahead of time and it only takes 20 minutes in the oven.

A couple of added notes here...
I had a bit of this for lunch today and it does great as a leftover!  The cauliflower stayed nice and firm; not mushy.  Also, I think I might very lightly roast my almonds before chopping them; not too much because I don't want them to get too brown during baking.


Cauliflower Gratin
Adapted from Rick Bayless' Test Kitchen
Serves 8

Ingredients:
3 pounds cauliflower
2 large (8 ounces) poblano peppers
2 Tbsp. butter
1/4 cup diced shallots
1 Tbsp. flour
1-1/2 cups heavy cream
1/4 cup grated Mexican queso anejo or other garnishing cheese such as Romano or Parmesan + 3 Tbsp cheese for final topping
1 tsp. salt
1/2 cup panko crumbs
1/2 cup finely chopped almonds
1 Tbsp olive oil

Mise en place:
  • Lightly oil and 11 x 7 casserole dish
  • rinse and cut cauliflower into bite-size florets
  • roast poblanos and place in plastic bag
  • dice shallots
  • grate cheese
  • chop almonds (by hand or food processor)
  • measure out butter, flour, cream, salt, panko crumbs and olive oil
Method:
Preheat oven to 400°F.  Bring a large pot of heavily salted water to a boil and scoop in the cauliflower florets.  Blanch for 4-5 minutes until just tender.  Drain and rinse under cold water to stop the cooking.  Spread onto towels and let the florets dry completely.

Remove the poblanos from the plastic bag and, wearing food gloves, peel and seed the peppers.  Pureé in a food processor until smooth.

In a 4 quart saucepan, melt the butter over medium heat.  Once the butter has melted, add the shallots and cook for several minutes or until the shallots have softened.  Stir in the flour and continue stirring for 2 minutes to make sure that the flour has cooked.  Whisk in the heavy cream slowly so you don't get lumps in your sauce.  Then stir in the queso anejo (or other cheese) and the poblano pureé.  Bring the mixture back to a boil and continue stirring until the sauce has thickened.  Remove it from the heat, season with 1 tsp salt.

Place the cauliflower florets into a large mixing bowl.  Pour the sauce over and gently toss to coat.  Scrape the mixture into the prepared casserole dish.

For the topping:
In a small mixing bowl, mix together 1/2 cup panko crumbs, 1/2 cup finely chopped almonds and 1 Tbsp. of olive oil.

Spread evenly over top of casserole and bake for 15 to 20 minutes or until the top is golden brown.  Remove the casserole from the oven and sprinkle top with remaining 3 Tbsp grated cheese.

I'm sharing this recipe at IHCC

Tuesday, April 3, 2012

Strawberry-Limeade Iced Tea

When our weather turns hot in Texas a cold glass of anything is pure heaven.  This flavored tea is part of April's Southern Living's spread on Strawberry Delights.

The base recipe is for Strawberry Limeade which is great all by itself.  You can add a little spritzer water to zing it up a bit.

For the iced tea version, you simply substitute fresh brewed tea for the iced water.


The strawberry limeade mixture doesn't lend itself as a sweetener for the tea, just flavors it nicely.  Between the two, I would stay with the base recipe and leave out the tea.  The strawberry and lime flavors are more prominent and the coloring is much prettier without the tea giving it a murky look.


Strawberry Limeade Iced Tea
Makes 7 cups

Ingredients:
3 cups sliced fresh strawberries
1 cup sugar
4 cups freshly brewed tea, chilled
2/3 cup fresh lime juice (about 4 large limes)

Mise en place:
  • brew tea and set aside to cool, then chill in refrigerator
  • wash, core and slice strawberries into large mixing bowl
  • measure out sugar
  • juice limes
Method:
Stir together the strawberries and sugar in a large bowl; crush strawberries with a wooden spoon, and let stand at room temperature 30 minutes.

Process strawberry mixture in a blender or food processor until smooth, stopping to scrape down sides as needed.

Press mixture through a wire-mesh strainer into a large pitcher; using the back of the spoon to squeeze out juice; discard solids. 

Add cold tea and lime juice, stirring until blended.  Cover and chill 2 to 4 hours.
For Strawberry Limeade, use 4 cups cold water instead of tea.

Wednesday, March 21, 2012

Classic White Bread


In the late seventies, my friend Tyra and I left the flatirons of Boulder, Colorado for the desert of West Texas.  There was an oil boom going on and we decided to get a little slice of it.  We traded the mountains for the flat, bare, dry, windy and dusty plains of the Permian Basin and experienced geographical and cultural shock.  Doesn't sound like a fair trade, but the experience we gained from it was worth it and I grew to appreciate it in many ways.

We opened a Tea Room in Midland, Texas which was actually a second location, as Tyra's mother owned the original in San Antonio.  We were just young ladies who didn't know what we were doing at the time, but we learned really quick.

Tyra's mother Helen taught us a thing or two; and one of those things was a Ribbon Party Loaf.  Classic ladies' luncheon fare, it is a loaf of white bread, crust removed and sliced horizontally in thirds.  The loaf was assembled with a base of white bread, layer of filling (chicken salad, egg salad, ham salad, pimiento cheese, et al), layer of white bread, an alternate filling and topped with the top layer of white bread.  All of this was encased in a spreadable cream cheese mixture then refrigerated for several hours or overnight.  Sliced up, it produced a striking and feminine sandwich on the plate.
 
Now that I have your curiosity all a-buzz, I'm sorry to tell you this post is all about the bread. This is what a Ribbon Party Loaf looks like.

I haven't made a Ribbon Party Loaf in 20 years and I want to make several this summer so my first order of business is to select a good, basic white bread recipe that won't fall apart, yet have a nice crumb and flavor.  The big test is how it will hold up with fillings and how it will slice.

All of that said, the clipping for today is a classic white bread recipe that I tore out of a King Arthur Flour catalogue many moons ago.


It's an easy bread to prepare by mixing all of the ingredients in the order they're given in the recipe (water, honey, yeast, salt, butter, flour and nonfat dry milk) and knead (with the dough hook or by hand - I did a little of both) until you have a nice smooth dough that is elastic.

Shape the dough into a ball and place in a lightly greased bowl - I used a large 8 cup measuring cup.  Cover with a tea towel and let it rise for 60 - 90 minutes until it is puffy.  It doesn't have to be doubled in size.


Gently deflate the dough.  Wow, my hands are getting old.  Oh wait, could that be because I'm getting old??


Shape it in a log 9" long


Place in a 9" x 5" lightly greased loaf pan.


Cover and let rise 60 - 90 minutes


until it's crowned 1" to 1-1/2" over the rim of the pan


Bake for 20 minutes.  The crown of this mass of dough is ripply; like my thighs; not really; I'll never tell.


Tent with foil and bake for another 15 to 20 minutes until golden brown or an instant-read thermometer reads between 195°F & 200°F.


Turn out onto a rack and let completely cool.


For what it's worth:  I am please with this bread.  It smells great, tastes great (especially with slathered with soft butter) and has the texture I'm looking for.  A test on how it holds up with fillings will be the next step in deciding if this will be the bread to become a party loaf!
Classic White Bread
Yields 1 large loaf; about 18 servings

Ingredients:
1 cup + 2 Tbsp, to 1-1/4 cups lukewarm water*
1 heaping Tbsp honey
2-1/4 tsp instant yeast
1-3/4 tsp salt
2 Tbsp soft butter
4 cups King Arthur Unbleached All-Purpose Flour
1/3 cup Baker's Special Dry Milk or 1/2 cup nonfat dry milk granules
*  Use the lesser amount in summer or humid climates; the greater amount in winter or drier climates.
(I used the lesser amount because it is raining cats and dogs this evening)

Mise en Place:
  • measure out all ingredients and allow to come to room temperature
  • lightly grease a large bowl (I use Crisco)
  • lightly grease a 9" x 5" loaf pan
Method:
Mix all of the ingredients in the order listed, and mix and knead to make a smooth dough, one that feels bouncy and elastic under your hands.  Place the dough in a lightly greased bowl, or large (8-cup) measuring cup.  Cover it, and let it rise for 60 to 90 minutes, until it's become quite puffy, though not necessarily doubled in size.

Gently deflate the dough, and shape it into a fat 9" log.  Place it in a lightly greased 9" x 5" loaf pan.  Cover the pan, and let the dough rise for 60 to 90 minutes, until it's crowned 1" to 1-1/2" over the rim of the pan.  Towards the end of the rising time, preheat the oven to 350°F.

Bake the bread for 20 minutes.  Tent it lightly with aluminum foil, and bake for an additional 15 to 20 minutes, until it's golden brown.  An instant-read thermometer inserted into the center will read 195°F to 200°F.

Remove the bread from the oven, and turn it out onto a rack to cool.  When completely cool, wrap in plastic, and store at room temperature.

Wednesday, March 14, 2012

Moroccan Preserved Lemons

I started making my own preserved lemons after watching an episode of Ruth Reichl's Gourmet’s Adventures with Ruth which ran on our PBS station a few years ago.  It was during the episode where she traveled to Morocco that I was schooled on this tangy condiment.  I use them a lot in salads and in chicken dishes.  They are so easy to make and it's nice to have them at your fingertips.


This is how I learned to make them.

The containers.

Select your container or containers, depending on how much you plan to make.  I prefer glass jars (clamp/gasket or Ball jars).  Wash and sterilize them.  I scrub mine by hand then boil them in a large pot of water for about 10 minutes.


Unless I am making gifts, I make just one jar to keep in the fridge.  Once my jar is clean and dry I toss a little kosher salt into the bottom of it.


The lemons.

Any lemon will do but choose unwaxed organic lemons.  I prefer Meyer Lemons with their deep yellowy-orange skin that's thin and fragrant.  It's juice is also a little sweeter and less acidic than a true lemon.  Select enough lemons to cram the jar full.  You'll want to buy extra lemons for juicing as well. 


Scrub your lemons clean.  This is what I use to clean most of my fruits and vegetables.


Cut each lemon through the center 3/4 of the way through making sure to keep intact.  Turn a half turn and make another slice 3/4 of the way through the lemon.


The lemon should look like this.  You'll have a quartered lemon that is still attached at the base.


Have a bowl full of kosher salt on hand and start packing your lemon with the salt.  As you finish packing a lemon, place it in the jar.


Repeat with the rest of the lemons until you have crammed the jar full.  As you stuff the lemons in the jar, you will want them packed in really tight and compress them so you release juices.


Over time, juices will naturally begin to release themselves but you will want to juice several lemons and pour the juice into the jar.


I also added a couple of sprigs of fresh thyme I had on hand.


The lemons can be stored on a shelf in a dark cook closet but I prefer the refrigerator.  Every two to three days for the first week, open the jar and compress the lemons, releasing more juice.  After a week, if the lemons are not completely submerged in the juices, juice another lemon or two and add the juice to the jar.

Walk off and forget about the lemons.  I don't even think about them for at least two months.

Uses:
  • remove the soft rind and mince it to add to salads
  • separate the rind and pulp and smear all over a roasting chicken and throw some inside the chicken too.
  • the rinds can be used in sauces (whole or chopped up)
  • you can use your lemons to flavor any savory dish
  • give them as gifts

Moroccan Preserved Lemons
The ingredients will vary depending on the size of your jar, the size of the lemons and how many jars you plan to make.  For the sake of giving you a guideline, I'm giving you the ingredients I used to fill a 2 cup gasket and hinge jar.

Ingredients:
8 Meyer Lemons, divided
1 cup Kosher Salt (you won't use all of this but it's better to have alot on hand than not enough!)
Fresh herb sprigs (optional)

Mise en Place:
  • Scrub jar and boil (without the gasket on) in a large pot of water (enough water to cover jar) for about 10 minutes - dry thoroughly
  • wash lemons and set aside
  • squeeze lemon juice from 2 of the lemons
  • pour salt in small mixing bowl
Method:
Drop a good pinch of salt in the bottom of the jar.

Slice 6 of the lemons in quarters 3/4 of the way through - all 4 sections should stay intact.

Take fingerfuls of salt and pack into the lemon.  Place into the jar.  Repeat with each lemon and as you pack them into the jar, use pressure to compress the lemons together and exude juices.  Once you have packed your jar full (I packed 6 lemons into my jar) slip in whatever herb you like (if you choose to use an herb at all).  Pour the lemon juice that you squeezed from the 2 lemons into the jar.

Replace gasket onto the jar lid the clamp the jar closed.  Place in refrigerator.  Every 2 to3 days, open the jar and give the lemons a squeeze to exude more juice.  After a week, if the lemons are not submerged in juice, add more freshly squeezed lemon juice.

Forget about the lemons for a couple of months and let nature take its course.

Friday, February 24, 2012

Zucchini alla griglia

Wednesday evening I slathered a roasting chicken with Moroccan preserved lemons and threw it in the oven for dinner.  Roasting a chicken is such a great, easy dinner.  Once it's in the oven you're free to do other things.  My "thing" that day was to work in the garden.  I took a day of vacation since the weather was to be so beautiful.

Another great thing about roasting a chicken is it never has to be the same.  Whatever I have in the refrigerator at the time gets thrown into the pot with it.  But, this is not about the chicken.  It's about what I made to accompany the chicken for dinner.

It is Lighten Up week at I Heart Cooking Clubs this week.  I selected a grilled zucchini recipe from Tessa Kiros' Twelve cookbook.  It was easy, light and paired great with the lemony chicken.


Zucchini alla griglia - Grilled Zucchini
Adapted from Tessa Kiros' Twelve-A Tuscan Cookbook

Ingredients:
3 medium-large zucchini (courgettes)
1/2 cup extra virgin olive oil
2 garlic cloves
about 6 basil leaves

Mise en place:
  • wash and dry zucchini
  • measure out olive oil
  • peel garlic cloves and lightly crush with the flat of a knife blade
  • roughly tear up basil leaves
Method:
Divide the zucchini into half horizontally, then cut into vertical slices about 1/8-inch thick.  Put them onto the grill about 8 inches away from the coals and grill for a couple of minutes on each side until they are cooked through and grill marks appear.  Transfer them to a bowl.  Add the olive oil, garlic, basil leaves and season with salt and pepper if necessary.

Tessa says this recipe may be eaten immediately, or left to marinate for a few hours.

I'm sharing this post at IHCC

Monday, February 20, 2012

Pesche al vino bianco

Pink was the theme this week at I Heart Cooking Clubs.  Out of the two Tessa Kiros books I own, I struggled with what to make that was pink. 

I settled on Peaches in white wine from Tessa's Twelve cookbook, with the hopes that the white wine would take on a pinkish color from the peaches.  Didn't happen.


Failing didn't get me down once I tasted this, in Tessa's words, "...very simple, refreshing dessert..".  I will be bringing this one back in the hot days of summer.

 All you do with this recipe is place peeled peaches (or nectarines) in a bowl with castor sugar and let macerate in the refrigerator.


After about an hour, pour in your white wine and put back in the refrigerator to chill.

Pesche al vino bianco - Peaches in White Wine

Ingredients:
8 medium sized, ripe, firm peaches, peeled
10-1/2 ounces castor (superfine) sugar
2 cups chilled white wine (I used a Pinot Grigio)

Mise en Place:
  • Peel peaches and slice
  • measure out sugar and wine
Method:
If you can halve the peaches and remove the stone without squashing the peaches before slicing them, then do so (best to use freestone peaches for this).  If the peaches are a little soft, cut thick slices toward the stone, then cut those slices away from the stone.  Put the slices into a bowl and sprinkle with the sugar.  Cover and leave in the fridge to macerate for at least an hour or so.

Add the wine, gently toss the peaches and return to the fridge for another 15 minutes before eating the peaches and drinking the remaining wine.

I'm sharing this over at IHCC

Thursday, February 2, 2012

Salmon Ceviche with Cilantro, Chili, and Lime

It is "some like it hot - and spicy" week a IHCC.  Since Mr. C., or as I like to call him - Lovey, does not like anything spicy, I knew I'd have to find one of Tessa Kiros' recipes that I could easily half and take to work with me for my lunch.


 I chose this ceviche recipe.  I love ceviche and I love all these ingredients so the selection was an easy one.  The lime, ginger and cilantro flavors with the light, delicate texture and flavor of the Coho Salmon were a perfect pairing.

The recipe halved easily but I could have used the original amount of red chile peppers for a little spicier dish.  Perhaps if I had left the veins there would have been more heat.


 Notice I'm wearing my food gloves that I love to use in the kitchen?  I suggest using these in so many ways when cooking, and especially when working with chiles and peppers since they have oils that can burn your skin and especially your eyes. 


 This was so easy to prepare.  Take care to mix it up in a nonreactive bowl.  Since I made this dish to take to work the next day, I stored it in a Ball jar for easy transporting.


Tessa states that this is even good the next day so I had no problem making it the night before.  She also suggested a lovely way to serve it with some firm green leaves and sliced red onions as a salad or with boiled potatoes.  For myself, I just ate it out of the jar at my desk and it was yummy!

Salmon Ceviche With Cilantro, Chili, and Lime
Adapted from "Falling Cloudberries" by Tessa Kiros
Serves 4 to 6 - Note: this is the full recipe as in the book

Ingredients:
1-1/4 pounds skinned salmon fillet
Juice of 4 limes
2 or 3 red chiles
2 Tbsp. chopped fresh cilantro
1/4 tsp. ground cumin
2 garlic cloves
1-1/2 inch piece of ginger

Mise en Place:
  • skin and remove any bones from the salmon
  • juice limes
  • seed and finely chop the chiles
  • chop cilantro
  • peel  & finely chop garlic cloves
  • peel and grate fresh ginger
Method:
Slice salmon fillet into pieces about 1/2 inch thick and put in a wide, nonreactive bowl.

Pour the lime juice, chile, cilantro, cumin, and garlic over the fish and season with salt and pepper.  Take the grated ginger between your fingers and firmly squeeze the juice over the salmon (discard the pulp that's left).  Mix gently, cover with plastic wrap, and refrigerate for at least 4 hours before serving.

I'm sharing this recipe at IHCC