Wednesday, May 30, 2012

Potato Stuffed Puff Pastry Squares

If you are looking for a nice side dish, especially for a chicken entree, I think you will like this one.  It would also be nice for brunch served alongside a tossed salad.

It's seasoned to pair well with poultry, it's not difficult to prepare and can be prepared ahead of time, it's filling, and will give your plate an elegant flare.

This clipping was pulled from a Winter of 1997 Penzey's spice catalogue.  The ingredients call for Italian Herb Mix.  If you don't have one already you can always make your own.  You have a wide choice of herbs to pick from; oregano, basil, marjoram, thyme, sage, and rosemary.  You don't have to have all of those in your blend; in fact, for this particular recipe, if your rosemary is not finely ground I would omit rosemary from your blend.  There just isn't enough cooking time and moisture in this to soften the rosemary; you don't want to bite into what feels like tough pieces  of grass.  It's a texture thing with me.

One suggestion might be 2 tsp. each of basil, marjoram and oregano and 1 tsp. of sage.  Blend that together and you'll use 2 tsp. of the blend in the recipe.


A very important step in this recipe is to eliminate the moisture from the potato and broccoli mixture once they are tender.  The last thing you want is an overly moist, runny stuffing.

There are leeks and mushrooms that nicely flavor the stuffing.


Throw the leek & mushrooms in with the potato/broccoli mixture along with the herbs, part of the milk & Parmesan cheese.


Grab a potato masher and take your pent up frustrations out on your stuffing.  I like it somewhat chunky but you can make it as smooth as you like.


Placing the stuffing and fontina on the pastry squares


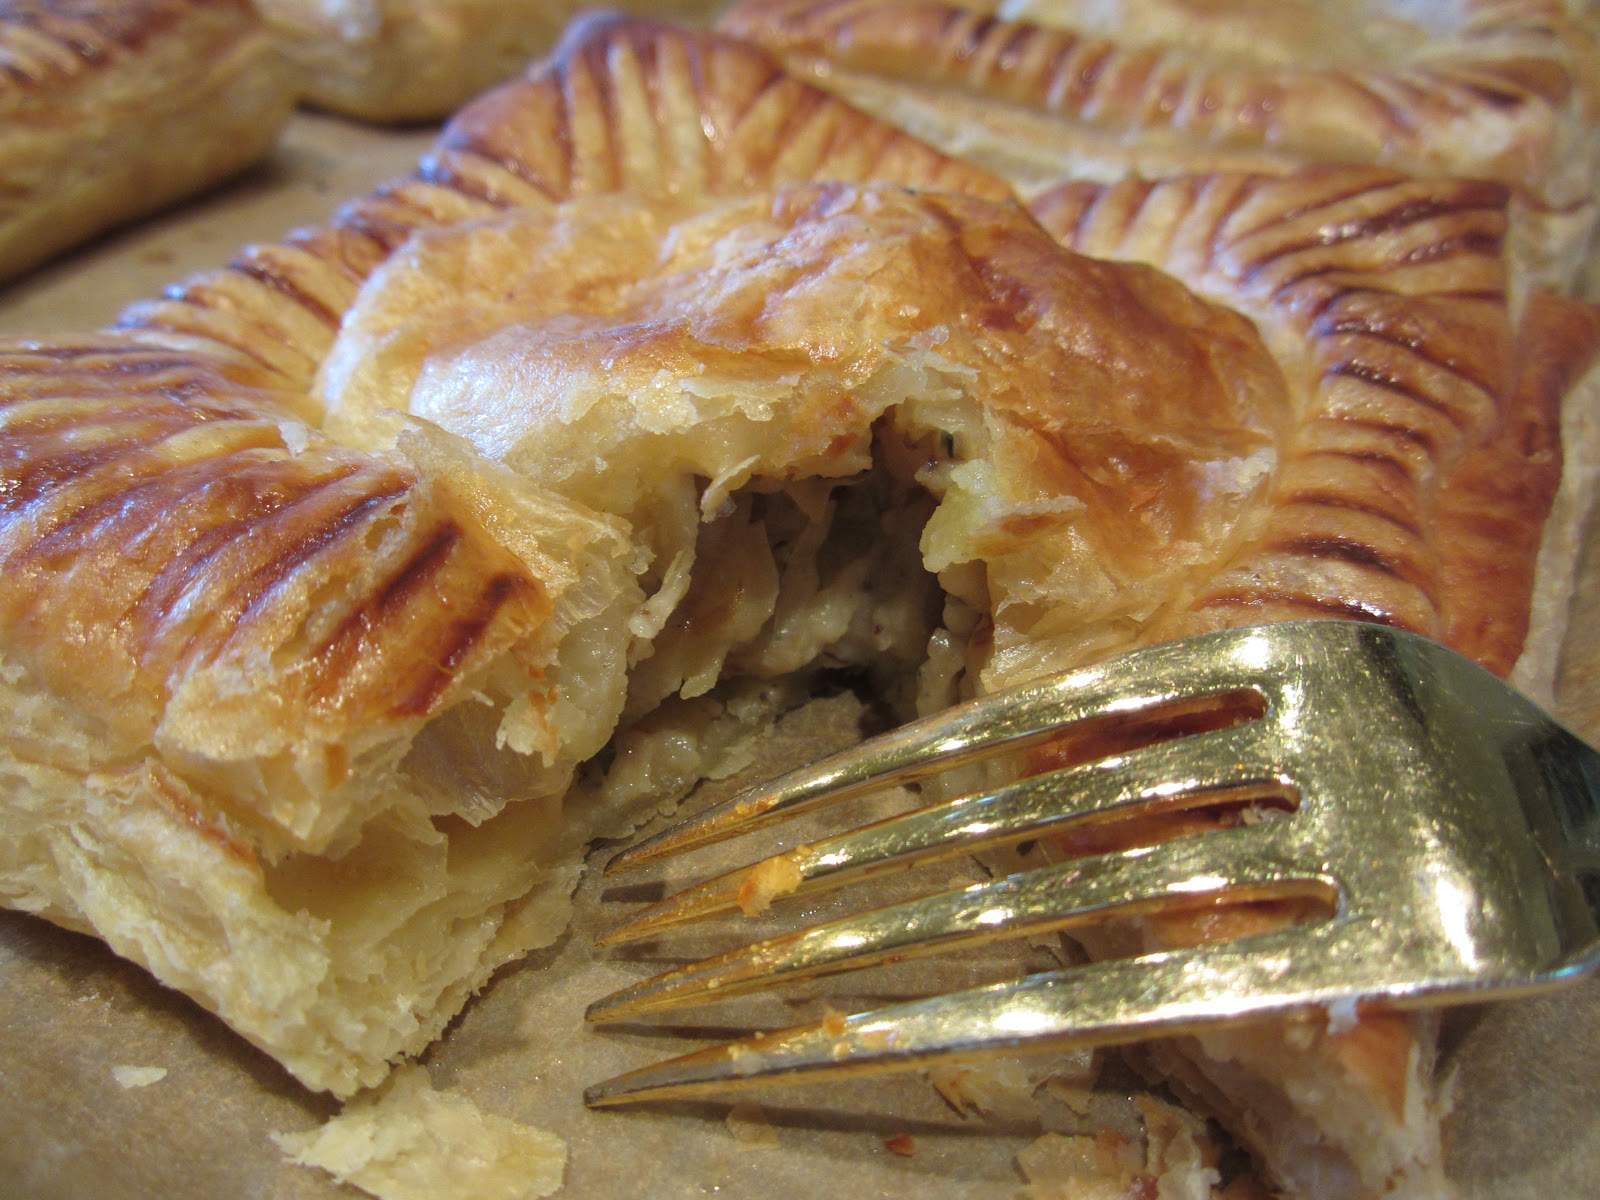
 Sealed, painted with the egg-milk mixture and ready for the oven.


 Notes:
See how I shaped the mounds of stuffing into a round mound?  You can also make them square.

I had a good 1/2 cup of filling left over.  I could have used a little more in each square but the recipe suggested to err on the side of too little stuffing.  So I erred.

I was afraid the filling was going to be too dry, but the fontina added just the right amount of moisture and flavor.

Make only what you need.  Puff pastry is just not the same as a leftover.


Potato Stuffed Puff Pastry Squares
Adapted from Penzey's
Serves 4


Ingredients:
1 lb. (2 sheets) puff pastry, frozen
1 medium potato
1/2 cup broccoli stems
2 tsp. Italian herb mix
1/2 tsp. granulated garlic
1 Tbsp. water
1/4 lb. mushrooms (a large handful)
1 regular-sized leek
2 tsp. olive oil
4 Tbsp. milk, divided
2 Tbsp. Parmesan cheese
1/2 tsp. ground black pepper
1/4 tsp. salt
1/4 lb. fontina cheese
1 egg


Mise en place:
  • remove puff pastry sheets from the box and inner bag, let thaw at room temperature while preparing stuffing
  • peel & quarter potatoes
  • peel the stems (also known as 'trunks' when I was a wee lass) of the broccoli and chop into small pieces
  • combine the herb mix, garlic & water and set aside
  • with a paper towel, wipe mushrooms clean and roughly chop
  • slice the leek in half lengthwise.  Peeling back layers, rinse thoroughly to remove any sand.  Slice white part only into thin slices
  • measure out 2 Tbsp. milk
  • grate Parmesan cheese
  • slice fontina in 1/4" thick slices
  • beat egg in small dish with remaining 2 Tbsp. milk
Method:
Preheat oven to 400°F.  Cook potato in boiling salted water until tender, about 10 minutes.  Toss the broccoli pieces in with the potatoes during the last 5 minutes of the potato's cooking time.

In a large fry pan, heat the olive oil over medium heat.  Add the mushrooms and leeks.  Cook, stirring, until the mushrooms and leeks are soft and just a bit golden, (about 4 minutes), remove from heat.

Drain the water from the potato and broccoli.  Cover pan with a lid and let dry over low heat for a minute.  Remove the pan from the heat.  Add the mushroom/leek mixture, the 2 Tbsp. reserved milk, Parmesan cheese, the herb mixture, salt & pepper.

Mash with a hand masher until the desired consistency is reached (a little chunky is nice, but you can make it totally creamy if you like).  Let cool a bit.

Line a baking sheet with parchment paper so the pastries don't stick during baking.

Lightly flour a work surface large enough to spread out the two sheets of puff pastry.  Lay the pastry out, sprinkle with flour and roll lightly with a rolling pin just to even out the creases.  Turn the pastries over, sprinkling a bit more flour on the work surface if the dough seems to be sticking.  Divide each large square into four equal smaller squares.

Place a large spoonful of the stuffing mixture in the middle of four of the pastry squares, leaving the outer inch of pastry bare.  Top each mound of stuffing with two slices of fontina cheese each.

Working with one square at a time, brush a bit of the egg-milk mix around the outside edge of the dough (using a pastry brush), and place another square on top, gently molding the square around the top and base of the stuffing.  Run your finger around the outside edge to seal the two pieces of dough together.  The object is to have as much stuffing on the inside as possible, without having so much that you can't get a good seal on the dough and the filling oozes out during cooking.

After filling, topping, and lightly sealing the edges of all four squares, press for tines around the edges in a nice pattern, making a good seal.  Poke a hole in the top with the fork, then brush the entire top sheet with the egg-milk mixture.

Using a spatula, place the pastries on the baking sheet and into the oven for about fifteen minutes, until golden brown.

Remove the pan from the oven and the pastries from the pan, using a spatula, then let cool for a few minutes before serving.

Thursday, May 24, 2012

Roasted Baby Beets

Beets don't usually receive many popularity votes in the vegetable world.  Chef Tyler Brown of the Hermitage Hotel in Nashville could very well change someone's opinion after they taste these baby beets.
I was only able to find golden beets in the baby variety.  The dish would be extra attractive with a combination of the golden and deep purple babies.  But at the end of the day, it doesn't really matter what color these tasty little tidbits are; they're just darn good.


This is all you need for this easy to prepare side dish


After cleaning and trimming the tops and bottoms of the beets place them in a baking dish.  Dot the beets with the butter, pour your liquid mixture over it all, toss the herbs in and cover tightly with foil.

You'll bake these for about an hour to an hour and 15 minutes.


The beets get a little sauté, then the reserved pan juices are added and will thicken up nicely.


Garnish with a little chopped parsley, chopped roasted hazelnuts & crumbled ricotta salata cheese.  Brilliant.

I nicked a bite of beet directly out of the oven and the broth mixture they cooked in flavored them so nicely.  I could have eaten them straight from the baking dish.


Roasted Baby Beets
Adapted from Southern Living recipe by Chef Tyler Brown - Oct. 2011
Serves 4 to 6

Ingredients:
2 pounds baby beets
4 Tbsp. butter, cut into pieces
1 cup vegetable broth - I made from Knorr broth cubes
1/4 cup honey
2 Tbsp. cider vinegar
3 fresh thyme sprigs
3 fresh parsley sprigs
1/8 tsp. salt
1/8 tsp. pepper
1 Tbsp. olive oil
Toppings:  chopped roasted hazelnuts, coarsely chopped fresh parsley, crumbled ricotta salata cheese

Mise en place:
  • if using for topping, roast hazelnuts in oven and let cool completely, then roughly chop
  • remove tops and ends of beets; wash beets
  • make vegetable broth
  • measure out honey
  • measure out vinegar
  • wash and dry herbs
  • cut up butter
  • measure out olive oil into large skillet
Method:
Preheat oven to 350°F.  Place cleaned beets in an 11 x 7-inch baking dish.  dot with butter.  Stir together broth and next 6 ingredients; pour over beets.  Cover tightly with aluminum foil.  Bake 1 hour and 15 minutes or until tender.  Remove beets, reserving 1/4 cup of the pan juices.  Cool beets for about 15 minutes;  peel and quarter (note:  the baby golden beets did not need peeling).

Cook beets in hot oil in a large skillet over medium heat, stirring often, 3 to 4 minutes or until lightly browned.  Pour reserved pan juices over beets; increase heat to medium-high.  Cook 2 to 3 minutes or until liquid is reduced to about 1 Tbsp.

Serve with desired toppings.

Ingredient information:  Ricotta salata is made from fresh Ricotta that has been pressed, salted and aged for about 3 months.  It's dryness, saltiness and the way it crumbles reminds me of an Italian version of Feta

Tuesday, May 22, 2012

Roast Chicken 101

Mmmmm....such a heavenly meal to make.  Easy, scrumptious and an essential for every cook's repertoire.  Oven roasted chicken is slightly different each time it is made in our house.  After understanding and learning the basic techniques to properly roast the chicken, the world is your oyster as far as all the different takes on it.  My 'take' is determined by what mood I'm in and whatever is in the pantry and refrigerator at the time I'm preparing it.

This, like a pot roast, is a dish that becomes your own.  This is the way I do it; today anyway.

The primary ingredient, quite obviously, is your chicken.  Select a whole chicken by weight according to how many people you are wanting to feed and also keep in mind how many leftovers you would like to have.  I happened to buy a six pounder for today's chicken.  After our evening meal Lovey and I will have some nice leftovers.

Remove the giblets from the body cavity and under very hot water quickly rinse the chicken, inside and out.  Set aside and dry the bird inside and out with paper towels.


After salting the cavity these are what's going inside the cavity today.  This is one area that you can get creative.  Put anything you want in there.  I just happen to have a lime, garlic and some oregano from the garden.

A little off-topic for a moment if I may....have you noticed how Jamie Oliver, Lorraine Pascale, and Nigella Lawson pronounce oregano?  They say oregano accenting the 3rd syllable, whereas we, on this side of the pond, put the emphasis on the 2nd syllable pronouncing it oregano.  I love putting the accent on the 3rd syllable.  It makes it a fun word to say.


When it comes to trussing the bird I normally tuck the wings underneath the chicken (if you're a wrestler think half nelson) and then just tie the legs together.  This chicken had its elbows clipped so there was nothing to tuck under; and that necessitated a more complete truss.


I started with about 5 feet of kitchen twine.  Place the twine across the top of the breast, bringing it down over the wings that are lying up against the side of the bird.


Turn the bird over and twist the twine


and turn the bird back over bringing the string back around to the top and bring it forward, drawing the string into the crevice between the leg and the body.


Now, take the twine under the ends of the legs and twist around a couple of times until tight and knot off.


If you don't have a rack to place in the bottom of your roasting pan you can make one by using your aromatics; slice your onions thick, surround with carrots and celery then plop your chicken right on top.  I have a rack so I placed my aromatics all around the bird.  This time around I used onion, garlic, celery, carrots,


Massage the bird with a tablespoon of softened butter or olive oil and she's ready to go!  Sometimes I pour a little white wine or broth in the bottom of the pan; sometimes I don't.  It's that mood thing again.

One of the nice conveniences about roasting a chicken is that you can prepare it ahead of time up to this point .  Cover it with foil and stick in the refrigerator until you are ready to pop in the oven.

Place your chicken in the oven that has been preheated to 425°F.  Brown for 15 minutes then turn the oven to 350°F for the remaining of your cooking time.

Some chickens, like this one, came with a built-in thermometer but I don't rely on them because half the time they never pop up at all (which it didn't this time).  A good rule of thumb on cooking time is 20 to 25 minutes per pound.   You can always use your own thermometer, checking the temperature to around 165°F and see if the juices run clear.  I stick the thermometer into the thigh, making sure the thermometer is not touching bone.

During your cooking time, baste the breast occasionally with butter, wine, broth, or juices from the pan.  Your call on this as well.  If your chicken is getting to dark yet still has quite a bit of cooking time to go, tent the pan with foil.

When the chicken is done let it rest at least 10 minutes before snipping of the trussing and carving.


Oh, and please allow the cook to take a photo of the finished product before slicing up your dinner.  Thank you.


Roast Chicken

Ingredients:
1 whole roasting chicken
onion
carrots
celery
garlic
lemon or lime
fresh herbs
butter or olive oil (about a Tbsp + some if using for basting as well)
salt

Mise en place:
  • rinse and pat dry the chicken, inside and out
  • Peel and cut onion
  • peel and slice carrots
  • slice celery stalks
  • poke citrus with a fork several times
  • peel and smash garlic cloves
Method:
Salt inside of bird cavity and place citrus, garlic and herbs inside.  Truss bird and place on rack in a large roasting pan, breast side up.  Place onion, carrots, celery, garlic and herbs all around the chicken.  Message the soft butter or olive oil all over the top and sides of the chicken.

Roast in a 425°F oven for 15 minutes.  Turn heat to 350°F and roast 20 to 25 minutes per pound (my 6 pounder took a little over 2 hours).  Baste frequently and tent with foil if the bird is getting too brown.

When a thermometer stuck into the thigh of the bird reads 165°F and the juices run clear, remove from oven and let rest 10 to 15 minutes before carving.

Friday, May 11, 2012

Pastel de Tres Leches - Celebration Cake

Pastel de Tres Leches - the cake of three milks. I never heard of it until I moved to Texas and I've only had it a couple of times. According to Rick Bayless, it is also called Celebration Cake  and is "..the special-occasion cake in Mexico". 

I was intrigued by Rick Bayless' version that uses "cajeta" instead of sweetened condensed milk.  It's goat-milk caramel.  And it's wonderful.  And it's sweet.  And it's easy to make at home.  Evidently, you can purchase it at the store, but I enjoy making ingredients myself.


It's made with goat milk, corn syrup, sugar, cinnamon, baking soda and cream sherry.

Trying my hand at making cajeta was not the only reason I chose to make this cake.  There are wonderful things about this cake like using roasted almonds to add texture to the sponge cake; giving the 3-milk mixture a bit of a custardiness by using heavy cream in place of the standard whole milk; frosting it with whipped cream; and, perfuming everything with orange.

When you read through the directions for this recipe it can be overwhelming because there are so many facets within the recipe; there is the cake, the flavoring and the frosting.  There are a lot of things that can be done ahead for this cake and that would certainly make it easier.  Such was the case with me.
One evening I made the cajeta.


The cajeta takes the place of the sweetened condensed milk.  You can use whole milk to make this sweet reduction too but it just isn't the same as using goat's milk.  The reduction becomes this wonderfully sweet, thick caramel sauce.

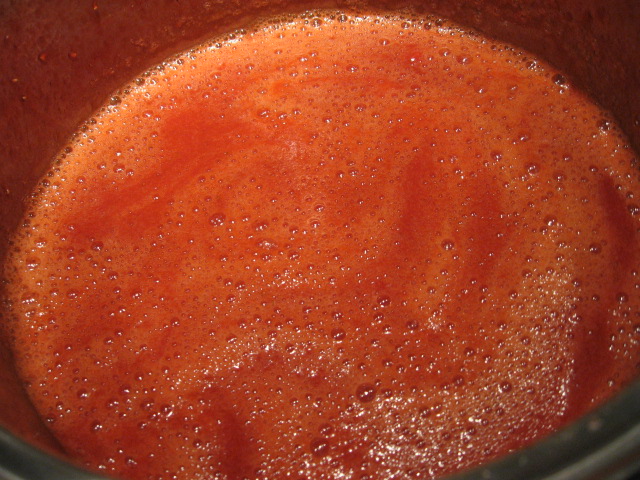
After bringing the milk, sugar, corn syrup and cinnamon stick to a boil you add the baking soda that's been dissolved with a little bit of water.  The mixture is then returned to the heat to simmer until reduced to a caramel brown syrup.  There's a lot of stirring but it will be well worth it.


Your next step is to strain it into a large measuring cup. 


After it cools down a bit add your cream sherry, brandy or rum.


You should have 1-1/2 cups of the milky, syrupy concoction that you can put into a Mason jar and store in the refrigerator.  Cajeta will keep a month or more when refrigerated.


The next night I roasted the almonds.  Once they were cooled I processed them with the cake flour until they were finely pulverized.

The next evening I made the cake. 


One of the first things you'll do is to brown your butter.  By browning the butter you are adding some really special flavor to the sponge cake.  Rick credits this sponge cake method to Rose Levy Beranbaum in her book The Cake Bible

After the butter browns and it cools a bit, add the vanilla and set aside.


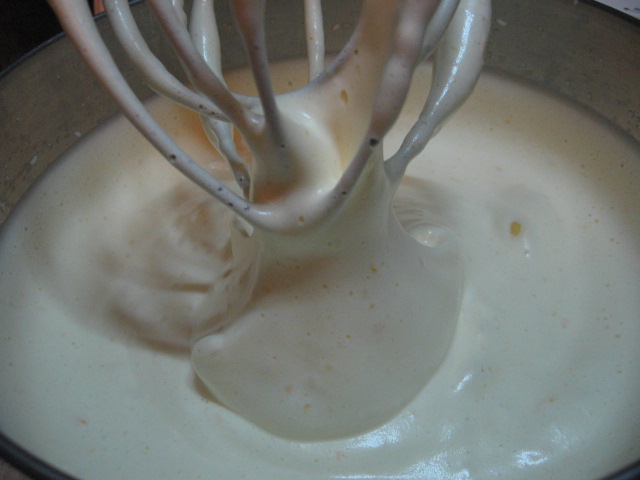
Bring the 1" of water in the bottom of your double boiler to a simmer and whisk the eggs, part of the sugar and the orange zest until they are foamy and very warm.  At that point, transfer to the bowl of your electric mixer and beat for a full 5 minutes.


When the egg mixture is very thick turn the mixer to the lowest speed and add 2 tablespoons of the flour-almond mixture at a time and mix until just incorporated until all the flour-almond mixture is added.


Add a good 1/4 cup of the batter to the cooled butter and whisk until completely incorporated.

Next, pour the butter mixture into the batter in two additions, folding each addition with a whisk.  Pour it into the prepared cake pan.  Bake for 35 minutes or until the top is springy and the sides begin to pull away from the pan.

While the cake is baking, mix up the 3-milk mixture and stick it in the fridge.  Tres Leches !!!!!  Can you roll the 'r'?  I don't do it very well.


Cool for 10 minutes in the pan then turn out onto a cooling rack.


Once the cake has cooled completely, and is still upside down on the cooling rack, slowly brush or spoon 1/2 of the 3-milk mixture onto the cake.  It's a slow process so be patient.  Let each addition soak in before you add more.  It is amazing how this sponge cake soaks up this mixture! 

When the cake has absorbed 1/2 of the mixture, place your serving plate over the cake and carefully turn over.  Now you can slowly apply the remaining milk mixture to the top of the cake.

Prepare your frosting by beating the heavy cream, sugar and orange liqueur (I used Cointreau) until very stiff.


Spread the frosting over the cake.  If you like, pipe some of it through a decorative tube.

This is a cake where you will really thank the Lord above if you practice the mise en place method. It will be so wild if you don't. It's one of those recipes that benefits from reading through several times and having everything ready to go.


Cajeta - Goat Milk Caramel
Adapted from Rick Bayless' Mexican Kitchen
Makes 1-1/2 cups


Ingredients:
1 quart goat's milk
1 cup sugar
1 Tbsp light corn syrup
1/2 inch cinnamon stick (preferably Mexican canela)
1/4 tsp baking soda
1 Tbsp cream sherry, brandy or rum


Mise en place
  • Measure out milk, sugar, corn syrup and cinnamon into a 4 quart heavy pot or Dutch oven
  • Measure out baking soda and mix with 1 Tbsp of water
  • Measure out liquor or your choice
Method:
Stir together your milk, sugar corn syrup and cinnamon stick in a medium-size (4 quart) heavy pot or Dutch oven.  Bring to a boil.  Remove the mixture from the heat and stir in the baking soda mixture, having a spoon ready to stir the mixture down if it bubbles up.  Cook, stirring frequently, over medium heat, until the mixture thickens into a pale-gold syrup, about 25 minutes.  At this point, begin stirring very frequently as the mixture thickens into a caramel-brown syrup that's the consistency of maple syrup, about 10 minutes longer.


Strain the cajeta through a fine-mesh strainer set over a large measuring cup.  Let cool for a few minutes, then stir in the sherry, rum or brandy (plus a little water, if necessary, to bring it to 1-1/2 cups).  Refrigerate covered.  When coled, the cajeta should have the consistency of thin corn syrup.


Celebration Cake - Pastel de Tres Leches
Adapted from Rick Bayless' Mexican Kitchen
Serves 12 - 15


Ingredients:
For the Cake -
3/4 cup (about 3 ounces) whole blanched almonds
1 cup (3-1/2 ounces) cake flour, sifted before measuring
10 Tbsp (5 ounces) unsalted butter
1-1/2 tsp pure vanilla extract
6 large eggs, room temperature
3/4 cup sugar
finely grated zest (colored rind only) of 1 orange

For the Flavoring -
3/4 cup heavy whipping cream
3/4 cup evaporated milk
2/3 cup cajeta

For the Frosting -
1-1/4 cups heavy whipping cream
2 Tbsp sugar
1/4 cup orange liqueur

Mise en place:
  • preheat oven to 325°F. 
  • prepare the cake pan
  • measure out almonds
  • sift flour & measure out into food processor bowl
  • cut butter up and place in small saucepan
  • measure out vanilla
  • crack eggs into a bowl
  • measure out sugar
  • zest the orange
  • fill bottom of double boiler with 1" of water
  • mix all ingredients for the flavoring in small bowl and store in refrigerator
  • measure ingredients for frosting
Method:
Grease a 2-inch deep, 10-inch round cake pan or springform pan.  Line the bottom with a round of parchment paper, then grease the paper and flour it all - pan and paper.  Spread the almonds on a baking sheet and toast in the oven, stirring them occasionally, for about 12 minutes, until aromatic and golden.  Cool, then transfer to a food processor along with the flour.  run the machine until the nuts are pulverized.
 
In a small pan, melt the butter over medium heat, stirring and swirling until nut brown, about 5 minutes.  Remove from the heat, cool a little, then stir in the vanilla.  Raise the temperature of the oven to 350°F.
 
Bring the water in the bottom of the double boiler to a simmer.  Combine the eggs, sugar and the orange zest in the top of a double boiler (you'll need to regulate the heat so the water no more than simmers), and whisk for several minutes, until the mixture is very warm to the touch and foamy, and the sugar is completely dissolved.  Transfer the mixture to the bowl of an electric mixer and beat for a full 5 minutes (the mixture will be as thick as whipped cream that almost holds peaks). 
 
With the mixer on the lowest speed, add the almond-flour mixture a couple of spoonfuls at a time, letting one addition just disappear before adding the next.
 
Thoroughly mix 1/4 cup of the cake batter into the butter mixture.  Then, in 2 additions, use a whisk to fold the butter mixture into the remaining cake batter.
 
Immediately and gently scoop the mixture into the prepared pan and bake until the cake feels slightly springy on top and the sides just begin to pull away from the pan, about 35 minutes.  Cool 10 minutes, then turn out onto a rack and cool completely.
 
Remove the bowl of the three milk mixture from the refrigerator and slowly brush or spoon half of the mixture over the cake while it is still on the cooling rack.  Carefully invert your serving plate over the cake and flip the two.  Remove the cooling rack from what is now the top and slowly brush or spoon on the remaining mixture.  (Soaking the cake will take 10 to 15 minutes, letting each addition soak in before adding more.)
 
With an electric mixer on medium-high speed, beat the 1-1/4 cups of the whipping cream, 2 Tbsp sugar and the orange liqueur until very stiff.  Spread the whipped cream over the sides and top of the cake.  Save a little to pip a border around the top and bottom edges of the cake.  Refrigerate until ready to eat.

Monday, May 7, 2012

Strawberry-Lemon Sheet Cake

There are some flavors that were made for each other.  Strawberry and lemon are two of those in my opinion.   I ran across this Strawberry-Lemon cake in "the box".  It's from a June 2004 issue of Southern Living.


Here are the cast of characters for the cake


 and the cast of characters for the strawberry sauce

I made the strawberry sauce the night before I needed it.


After I cooked down my strawberries, they were still quite chunky so I took an immersion blender to the fruit.


That smoothed it up nicely for me.


Placing a piece of wax paper or plastic wrap will keep the sauce from forming a skin.  I put it in the refrigerator and let it set over night.  You will need to take a whisk to it the next morning before you use it.

The strawberry-lemon filling turned out tasty.  The strawberry was definitely winning out in the flavor department but I was able to detect a little tang of lemon.  Not quite as lemony as I would have liked.

The cake is a thin sheet cake that had a sponge cake texture to it.  After letting the cake completely cool (1st in the pan then on a cooling rack), I turned it out onto a large cutting board and quartered it (you can 1/2 it if you prefer).  Upon taking a little nibble of the cake I didn't think the cake had any lemon taste to it (it only called for 1 tablespoon of lemon juice and 1 tablespoon of lemon rind).


I decided more lemon was needed so I mixed up a lemon glaze and spread on the cake layers prior to spreading the strawberry-lemon filling.

That was definitely the right choice for lemon flavor.


But, maybe not so much on the engineering front.  Laugh as you will.  I did.  The goal of this site was never to perfect the recipe then post it. 

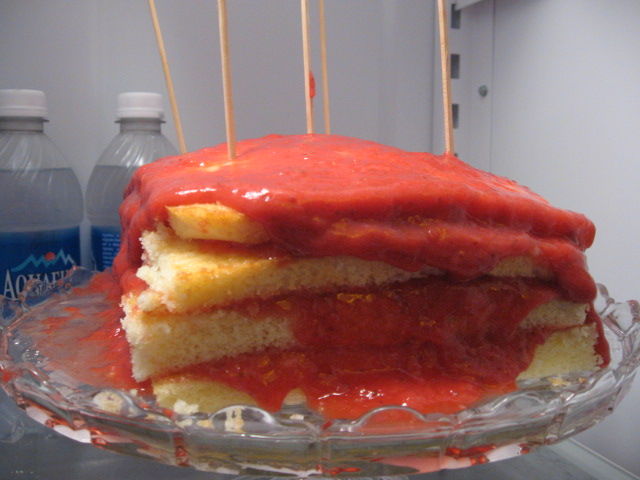
The glaze put a bit of a slick surface on each cake layer once it was dried. I spread a layer of strawberry filling on top of the glaze and once the second layer was laid on top it proceeded to slide like a slow avalanche.

Several skewers solved the problem and once the cake was placed back in the refrigerator the filling firmed up, and the cake was once again stable and I was able to work the layers back on top of each other.  Covered in whipped cream, you'd never know it was a near disaster!


Sliced up and plated the layers were very pretty and the cake was really tasty. 

Thoughts and Notes:
■  Mix this cake batter by hand for a more tender and moist cake.
■  Even with all the construction flaws this is a good tasting recipe once the extra lemon element was added.  I think it would have been blah without the lemon glaze.
■  This recipe would be easier to manage made into individual 2-layer mini-cakes by cutting the sponge cake out with a 3"- 4" round cookie cutter or some other geometric shape.
■  I don't know if the lemon glaze had anything to do with the slipping and sliding, but I'd do it again because the cake desperately needed more lemon.
■  The next go 'round (yes, I will address this cake again) we'll try the minis and possibly baking the cake in a smaller pan so it's thicker and the layers can be shaved flat on top (this was too thin to trim any off the top).


Strawberry-Lemon Cake
Adapted from a recipe by Angie Beachy of Lusby, Maryland and featured in the June 2004 issue of Southern Living


For the Strawberry-Lemon Filling
Ingredients:
1 (16 ounce) package whole frozen strawberries
6 Tbsp sugar, divided
1/4 cup fresh lemon juice
1/4 cup all-purpose flour

Mise en place:
  • measure and divide sugar
  • squeeze lemon juice
  • measure flour
Method:
Bring strawberries, 4 Tbsp of the sugar, and the lemon juice to a boil i a medium saucepan, and cook 5 minutes.

If your strawberries are very chunky use an immersible blender to make the filling smooth.

Whisk together remaining 2 Tbsp of sugar and the flour in a saucepan.  Whisk in strawberry mixture; cook over medium heat 5 minutes or until thickened and bubbling around edges.  Pour into a glass bowl, cover surface with plastic wrap or wax paper; chill at least 2 hours or over night.

For the cake
Ingredients:
2 cups cake flour
1-1/2 cups sugar
2 teaspoon baking powder
1/2 teaspoon salt
3 large eggs
3/4 cup whole milk
1/2 cup vegetable oil
1/4 cup butter, melted
1 tablespoon grated lemon rind
1 tablespoon fresh lemon juice

Mise en place:
  • melt butter and allow to cool
  • grate lemon rind
  • squeeze lemon juice
  • break eggs into a medium mixing bowl
  • measure out milk & oil
  • measure out flour, sugar, baking powder and salt into a large mixing bowl & whisk together
Method:
Line a lightly greased 15" x 10" jellyroll pan with parchment paper; lightly grease the parchment paper.  Preheat oven to 350°F.

Add the cooled butter, milk, oil, lemon rind and lemon juice into the mixing bowl with the eggs and whisk together until blended.

Whisk into dry ingredients just until blended.  Pour batter into prepared pan.

Bake at 350°F for 30 minutes or until wooden pick inserted in center comes out clean.  Cool cake in pan on wire rack 10 minutes.  Invert cake onto a wire rack, and remove parchment paper; let cool completely.  Transfer cake to a large cutting board.

For the Lemon Glaze
Ingredients:
1-1/2 cup powdered sugar
3 Tbsp fresh lemon juice
zest of one lemon

Mise en place
  • measure out powdered sugar into small mixing bowl
  • zest the lemon
  • juice the lemon
Method:
Using a whisk, mix all three ingredients until well combined.

For the Whipping Cream
Ingredients:
1-1/2 cups heavy whipping cream
6 Tbsp sugar

Method:
Beat whipping cream and sugar at high speed with an electric mixer until stiff peaks form.  Refrigerate.

Assembly
Cut sheet cake in quarters to create rectangles.  Divide the lemon glaze among the 4 layers, allowing to drip down sides slightly.  Place bottom layer on serving plate.  Spread filling on bottom layer.  Place second layer on top of bottom layer; spread filling on top of second layer; repeat this process with last two layers.  Secure with skewers stuck through the top of the cake, if necessary.  Refrigerate while you make the whipping cream.

To frost this cake you can simply spread the whipped cream on the sides and top of the cake, or just the sides.  You can also spoon the whipped cream into a pastry bag and decoratively pipe around the sides of the cake, leaving the top un-covered showing off the bright red filling.

Sunday, May 6, 2012

Crispy Chicken Tacos with Tomato Broth

Lovey's favorite thing to eat when we go to a Mexican Restaurant are Chicken Taquitos or Flautas. 

I found this recipe for Crispy Shrimp Tacos, adapted from Rick Bayless' Fiesta at Rick's.  I substituted chicken for the shrimp.  I also don't add the Jalapeños when making for Lovey.  I personally think a little heat amps up the flavor.

Mr. Bayless calls these tasty cylinders crispy tacos.  In the land of Tex-Mex we call them taquitos.  Out of respect of Rick's recipe (and the fact that he is an expert in Mexican cuisine and I'm not) I will call these tacos.


Main ingredients for our filling are chicken tenders, tomatoes, onion, garlic, cumin, cilantro and salt


The filling is easily prepared in a large skillet.  The majority of the preparation time is cutting and chopping up all of the ingredients.  After that it all goes together quickly.  Once the filling is finished, remove it from the heat and let it cool. 

A good time to make the tomato broth is while the filling is cooling off.
Begin by roughly chopping onion, tomato and garlic and pureéing it in a blender.  Make it nice and smooth.  Pour the puree in a skillet with some olive oil, add your broth and let it reduce.


This broth is so over the top good and triples the goodness of the tacos.  This can be used with so many recipes.  I ate the leftovers in my dipping bowl with a spoon. 

While the broth is reducing begin heating up the vegetable oil.


Use a heavy, large skillet or pot to deep fry the tacos.  I have a deep fat fryer but I also use my cast iron chicken fryer.  It's nice and deep to easily hold the 2 inches of oil that's required. I'm addicted to cast iron.


The recipe makes 12 tacos.   These are a little rough looking, but who cares.


Crispy Chicken Tacos with Tomato Broth
Adapted from Here

 For the Tacos
Ingredients:
1 Tbsp olive oil
1/2 medium sweet onion
2 garlic cloves
2 Jalapeños or preferred spicy chiles
1 tsp cumin
3/4 pound tomatoes (2 medium-sized)
1 pound chicken tenders (or shrimp)
3 to 4 Tbsp fresh cilantro
salt to taste
12 thin corn tortillas
vegetable oil for frying (enough to have a depth of 2" in your pan)

Mise en place:
  • chop onion into 1/4" dice
  • finely dice garlic cloves
  • seed, de-vein and finely dice jalapeños
  • cut chicken into 1/2" pieces (if using shrimp peel, de-vein and cut into 1/2" pieces)
  • chop tomatoes into 1/4" dice or run through grating disc on food processor
  • roughly chop cilantro
  • fill deep frying pan with 2" oil
  • Have a jelly roll pan ready to use for the softened tortillas, a plate to hold the rolled tacos and a plate covered with paper towels for draining the fried tacos.
Method:
In a large sauté pan, heat olive oil over medium heat.  Add onion and cook, stirring occasionally, until translucent, around 3-4 minutes.  Add garlic, chilies, and cumin and cook for another minute.  Add the chicken (see note below if using shrimp) & tomatoes and cook, stirring occasionally, until the filling reduces to a thick sauce.  Remove from heat and allow to cool.  Stir in cilantro and season with salt to taste.

(if using shrimp, add after the mixture has thickened and cook for only one minute before removing filling from heat).

Heat the oil to about 350 - 375°.  Grab two tortillas at a time with a pair of tongs, dip them for a few seconds in the oil to soften them.  Pat dry with paper towles and pile them into a single stack (I use a jelly roll pan for this).  With all tortillas softened, move to one side of the jelly roll pan and use the other end for your rolling surface.  Have a platter ready to set the rolled tacos on.  Spoon about 2 Tbsp of filling across the bottom of a tortilla, roll tightly and secure with toothpicks.  Place on platter.  When all tortillas are rolled you're ready for frying.

Fry the tacos in the hot oil for about 1-1/2 minutes, then turn over and fry until golden.  Drain on paper towels and serve immediatley with tomato broth.


For the Broth
Ingredients:
3/4 pound ripe tomatoes
1/2 medium sweet onion
2 cloves garlic
1 Tbsp olive oil
2 cups chicken or shrimp broth
salt to taste

Mise en Place:
  • roughly chop tomatoes
  • roughly chop onion
  • peel and roughly chop garlic
  • meausure out broth
Method:
Place the prepped tomatoes, onion & garlic in a blender and pureé until smooth.

Heat the olive oil in a medium saucepan.  When the oil is hot enough to sizzle a drop of the pureé, cook and stir until noticeably thicker and darker, around 5 minutes.  Add the broth, bring to a boil and simmer on medium-low heat for 30 minutes.  It should be somewhat runny.  Season to taste.

I'm sharing this recipe at IHCC.  Go see what everyone else made this week!