Saturday, April 23, 2016

Strawberries and Cream Cake

Lovey selected this clipping from the April 2013 issue of Southern Living.

I'll just say up front that this cake is very easy but takes a lot of time to create.  A lot of that time is everything cooling off in the refrigerator.  They should call this Patience Cake

There are three components: the cake layers, a strawberry jam filling and a strawberry frosting.

It will make it easier on you if you start the jam and the cake layers a day or two ahead of serving.

For the Jam

Begin by slicing up or roughly chopping fresh strawberries then mashing them up with a potato masher.  A pastry blender gets the job done as well.


Add sugar, blend and let stand for about half an hour.  (There's 1/2 hour waiting)


Bring this to a boil over medium heat; let boil for 5 minutes.  Remove the saucepan from the heat and stir in strawberry gelatin until dissolved.  Let this sit and cool for about an hour (another hour of waiting).


Once cooled pour into a covered container and refrigerate for 8 hours. (we're up to 9-1/2 hours waiting now).


Once the jam is in hibernation, make the cake layers.


You will be making six 8-inch layers.  I just happened to have 6 throw-away tins so I used those.  They've been taking up cabinet space for more time than they are worth.


Grease and flour each cake pan.


Separate the eggs.  There are a lot of eggs in this cake.


Measure out the dry ingredients and the oil, lemon juice and water.


Mix the dry ingredients in a mixing bowl then make a well in the center.


Add the oil, lemon juice, water and egg yolks and beat 3 or 4 minutes until smooth.

I mixed up the batter with my hand mixer because I'm going to use the stand mixer for the egg whites.


Sugar and cream of tartar will be added to the egg whites.


Beat the egg whites and the cream of tartar at medium-high until soft peaks form.


Gradually add the sugar, 1 Tbsp. at a time, beating until stiff peaks form.


Gently stir about a fourth of the egg white mixture into the cake batter.


Gently fold in the remaining egg white mixture into the batter.


Spoon batter into the cake pans, dividing equally.


Smooth tops with an offset spatula.


Bake until a wooden pick inserted in center comes out clean.  The instructions called for 12 - 15 minutes of baking time but I baked them for about 20 minutes before a cake tester came out clean.


After resting in the pans for about 10 minutes, remove from pans and allow to cool completely on wire racks, about an hour.  (we're up to 11 hours cooling time now)

I covered the cake layers and began the assembly the next day. 


Cover a cake board with foil and place one layer on the cake board


Give the chilled jam a good stir and spread about 2/3 cup on top of the first layer, leaving  1/4" border around the edges.


Repeat with the remaining layers but do not spread any jam on the top layer.  You will have jam left over.


Now, wrap the complete assembly in plastic wrap and, you guessed it.....put it in the refrigerator for 8 to 24 hours.  (we now have a tally of 19 to 35 hours of chill time)


Now it's time to ice the cake.  I was so tired of working on this thing that I didn't even take photos of making the frosting.  Again, like every step in this recipe it was very simple and easy; nothing difficult.  The magazine photos of the finished cake showed the icing to be as smooth as a baby's butt.  Mine definitely didn't look as pristine.

Oh, and I forgot to mention that once the cake is iced.... it has to be refrigerated for at least 2 hours.


It was impressive and showy


It was also very tasty; but here's the thing...

After the first bite, Lovey and I looked at each other and said, "Tastes just like strawberry shortcake".  And it did.  Lawzy Mercy!  Next time I'm wanting something like this I'll just make shortcake from scratch, cut up some fresh berries and top with whipped cream!

But if you want to make an impressive looking cake that tastes just like strawberry shortcake here is how to do it.


Strawberries and Cream Cake
Adapted from the April 2013 issue of Southern Living
Serves 12

The Strawberry Jam Filling
Ingredients:
2 pounds whole strawberries
2-1/2 cups granulated sugar
1 (3 ounce) package strawberry flavored gelatin

Method:
Wash and slice  or roughly chop strawberries. Using a pastry cutter mash the berries so you have  4 cups mash.

Stir together the strawberries and sugar in a large saucepan; allow to sit and macerate for 30 minutes.

Bring strawberry mixture to a boil over medium heat; boil 5 minutes.  Remove from heat and stir in gelatin until dissolved; cool completely (about 1 hour).  Cover and chill for 8 hours.

The Cake
Ingredients:
2 cups sifted cake flour
2-1/2 tsp. baking powder
1/2 tsp. table salt
1-1/4 cups sugar, divided
1/2 cup canola oil
1/4 cup fresh lemon juice
4 large egg yolks
1/4 cup water
8 large egg whites
1 tsp. cream of tartar

Method:  
Preheat oven to 350°.  Grease and flour 6 8-inch round cake pans.

Stir together the first 3 ingredients and 1 cup of the sugar in a large bowl. Make a well in the center of mixture; add the oil, the lemon juice, egg yolks, and water. Beat at medium-high with an electric hand mixer 3-4 minutes or until smooth.

In the bowl of a stand mixer, beat egg whites and cream of tartar at medium-high speed until soft peaks form. Gradually add remaining 1/4 cup sugar, 1 Tbsp. at a time, beating until stiff peaks form. Gently stir one-fourth of egg white mixture into flour mixture; gently fold in remaining egg white mixture. Spoon batter into the 6 prepared cake pans.

Bake at 350° for 12-15 minutes or until a wooden pick inserted in center comes out clean. Cool in pans on wire racks 10 minutes; remove from pans to wire racks, and cool completely (about 1 hour).

Spread the chilled filling between the cake layers, leaving a 1/4-inch border around the edges (about 2/3 cup between each layer). Don't spread any filling on the top layer. Cover the cake with plastic wrap, and chill 8 to 24 hours.

The Strawberry Frosting
Ingredients:
1 Tbsp. strawberry-flavored gelatin
2 Tbsp. boiling water
1 cup chilled whipping cream
1/4 cup granulated sugar
1 - 8 ounce container chilled sour cream

Stir together first 2 ingredients in a small bowl; cool completely (about 20 minutes).

Beat whipping cream and gelatin mixture at high speed with an electric mixer until foamy; gradually add sugar, beating until soft peaks form. Stir in sour cream, 1/4 cup at a time, stirring just until blended after each addition. 

Assembly
Place the chilled, layered cake on a cake plate or stand.  Spread the frosting on top and sides of cake.  Chill 2 hours before serving.


Wednesday, April 13, 2016

Baked Meatballs


I took this recipe from Alton Brown. I love the flavor created by the three types of meat that are used. If you have an affinity to lamb, you can use more beef and pork as a substitute.  I personally love lamb. Lovey doesn't know there is lamb in these. Lovey doesn't care for lamb but he gobbles these up. Perhaps he only thinks he doesn't like lamb.

I doubled Alton Brown's recipe so I could freeze them and have them on hand for a last minute supperNow that I'm cooking for Papa (my father-in-law), convenience is a nicety. If you are not planning on freezing any I would recommend halving the recipe.


The meatballs will be flavored by these: Parmesan, dried basil, dried parsley, garlic salt, and red paper flakes


These ingredients will add texture and binding: thawed and squeezed frozen spinach, lightly beaten eggs, and bread crumbs. The bread crumbs are divided in half; one half mixed in with the meat mixture and the other half for coating.


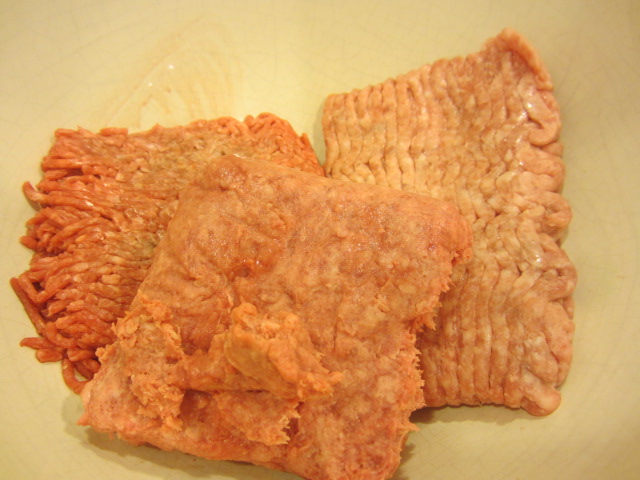
In a large mixing bowl combine your three meats: pork, lamb, and ground chuck.

Once the meats are lightly combined, add the flavorings and binders and mix until incorporated.

Just a note on mixing and shaping.  When you are mixing all of your ingredients, use your hands (I use gloves) and mix with your fingers gently until everything is incorporated.  Don't squeeze like your squishing the heck out of a piece of play dough; you don't want the mixture to be compacted.

Cover the bowl and set the meat mixture in the refrigerator for at least an hour
 After the meat mixture has rested, form into 1-1/2 ounce balls (1 fluid ounce volume scoop) and set aside on a parchment lined baking sheet.


Gently roll each portion into a ball .  Remember, you don't want a rock hard, compacted piece of meat!


In a small bowl place the remaining amount of bread crumbs. One meatball at a time, gently toss in the crumbs to lightly coat.


Place each breaded meatball in the cup of a mini cupcake tin. 


Bake at 400° for about 20 minutes; drain on a paper towel.

At this point you can add to spaghetti sauce or make a meatball sub.

If freezing, place the drained meatballs on a parchment-lined cookie sheet and place in freezer.  Once frozen solid, place meatballs in a plastic freezer bag.

Very easy procedure:  measure & mix, weigh & shape, roll & coat, bake & drain.


 BAKED MEATBALLS
Adapted from Alton Brown
Yields approximately 40 meatballs

Ingredients:
2 - 5 ounce packages chopped frozen spinach
1 cup finely grated Parmesan
1 Tbsp. dried parsley
1 Tbsp. dried basil
1 Tbsp. Lawry's Garlic Salt
1 tsp. red pepper flakes
1 cup dried bread crumbs, divided
2 eggs
1 pound ground pork
1 pound ground round or chuck
1 pound ground lamb


Method:
Preheat oven to 400° F.
  
Thaw spinach and squeeze out all the liquid that you can.
Grate the Parmesan and measure out the parsley, basil, garlic salt and red pepper flakes.
Divide the bread crumbs in half. 
Lightly beat the eggs.

In a large mixing bowl, lightly combine the three meats.

Add the spinach, Parmesan, parsley, basil, garlic salt, pepper flakes, 1/2 cup bread crumbs and eggs to the meat mixture. With your fingers, mix all the ingredients. Avoid 'squishing' the meat together. You don't want your meat compacted. Use your fingers and combine until everything is evenly mixed.

Allow mixture to rest in refrigerator for at least an hour.

Using a food scale measure out 1-1/2 ounces of meat portions, or use a 1 fluid ounce scoop.  Place portions on a parchment lined sheet pan.  With your hands, gently roll the weighed out portions into balls.

Place each ball into the cup of a miniature muffin tin.

Bake for 20 minutes or until golden brown.  Drain on paper towels. 

Friday, January 1, 2016

Black Eyed Peas


I posted a black-eyed pea recipe a few New Years ago that was prepared in a slow cooker. This year I cooked them on the stove top


I spent New Years at Papa's this year so I made a small pot for us and his girlfriend.  I found a package of fresh black-eyed peas so soaking them overnight was unnecessary and it made the cooking time a lot shorter.


 My flavorings were onion, jalapeno, garlic and fresh thyme.


I let the vegetables sweat in a little olive oil


then I added this bad boy.  Papa had a honey baked ham for Christmas and I cut the bone out of it.  The honey baked ham bone made a milder broth than a smoked ham hock that I would normally use.


I added some broth, the thyme and the peas.


I threw in a handful of chopped up honey baked ham


After bringing everything to a boil the heat was turned down and the peas simmered about an hour until they were tender but not mushy.

I don't add any salt until the peas are done.  The reason is that I never know how salty the ham or the broth may be.  With this batch, I didn't have to add any at all.


Waiting on the corn muffins to come out of the oven so we can eat a little bit of good luck for 2016!


Stove-Top Cooked 
Serves 6 to 8

Ingredients
1/2 Tbsp. olive oil
1 small yellow onion
3 cloves garlic
1 large jalapeno pepper
1 large ham bone
5 cups chicken broth
3 sprigs fresh thyme
1 pound fresh black-eyed peas
 3/4 pound honey baked ham
salt to taste

Mise en Place
  • chop onion
  • mince garlic
  • remove seeds and veins from jalapeno and finely dice the pepper
  • measure broth
  • cube the honey baked ham
Method
Heat Dutch oven over medium heat and add olive oil.  Toss in the onion, garlic and the jalapeno.  Allow to sweat for a few minutes; do not let them brown.  Add the ham bone, broth, thyme, black-eyed peas and the cubed ham.  Bring to a boil then turn heat to medium low and allow peas to simmer.

Check the peas for doneness after 1 hour.  Allow to simmer longer if necessary.  You want them to be tender but not mushy and falling apart. Serve with hot corn muffins.

Saturday, December 26, 2015

Potage Crécy (Cream of Carrot Soup)

The reference of Crécy in the name of this cream soup (potage) is to Crécy-en-Ponthieu; a region in Northern France that is famous for growing, in their opinion,  the most tasteful carrots. The area is also known for a battle in the fourteenth century in which England kicked some French butt.  Anyhow, the French generally refer to cream of carrot soup as Potage Crécy.   

But that's not why I'm making this today.  I'm making it because my Papa inspired me to make it.

We were visiting one night about the days when Lovey used to gallivant around France on a regular basis searching for antiques.  Papa shared a little story about a time Lovey took him along on one of his buying trips.

At the end of a long day, and fairly late in the evening, they checked in to a small inn in Beaune.  They were tired and hungry.  The woman who ran the inn apologetically let them know that the only thing she had left in the kitchen was cream of carrot soup.

Two men from west Texas weren't overly excited about this but they were hungry.  So they conveyed to her that soup sounded great.  She brought out two bowls of this extremely hot, creamy, orange soup and a loaf of crusty bread.  They ordered two more bowls each and with each order and praise of how wonderful the soup was the lady became more endeared to them.  

So, with that pleasant recollection that Papa shared with me I thought I would place cream of carrot soup on the menu for Christmas dinner.

I didn't have a saved clipping for cream of carrot soup but I did have a clipping for a cream of pea soup that I have posted here in the past.  This is such a basic French technique to make any cream vegetable soup, or potage.  In France a "soup" usually means the dish has chunks of vegetables in it; a potage means it is pureéd.


There's not much to it.  You sauté / simmer what ever vegetable you are going for in a broth.  You can add other vegetables that lend flavor and/or color.  So, this is what I did for the carrot soup.  I don't have any idea how their potage looked or tasted at that little inn; I just made this up.


I diced up carrots, yellow onion, a little potato, garlic and added a little dried thyme, ground cardamom (I wanted to use grated nutmeg instead of the cardamom but I was left to use what resources were in Papa's pantry) and lemon juice.  All of these were simmered in chicken broth until the vegetables were tender.


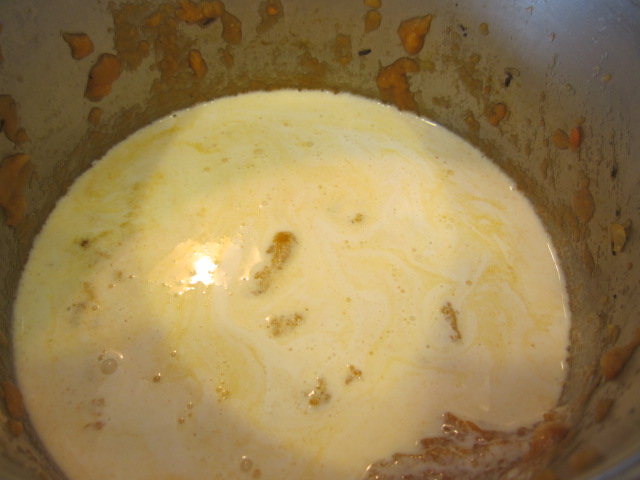
This is a really un-appetizing photo, I know.  I failed to snap a photo once I had pureéd the mixture...you know how hectic it gets at that moment when everything is coming together for Christmas dinner and everything gets crazy (after 4 hours of very calm preparation).  After the vegetables are pureéd the cream is added, mixed well with the pureé and re-heated.

Papa did not have a blender so I used an immersion blender.  If you prefer, as I do, a really smooth potage use a blender.  Using an immersion blender or a food processor will give you a rougher pureé.  But the taste is not compromised.

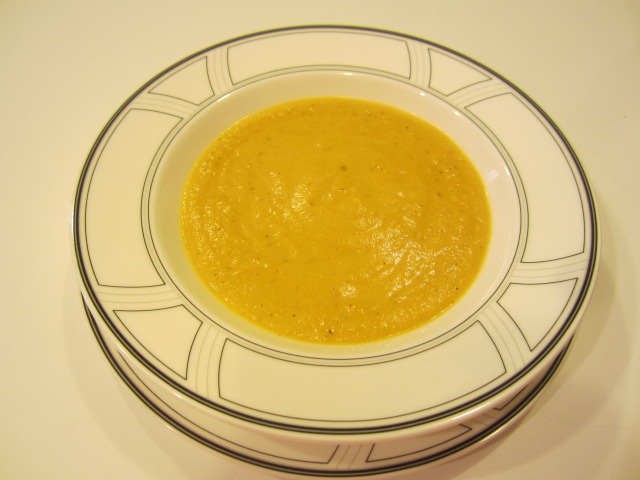
The soup was a hit but most important to me (even though he didn't say it was just like his bowl of soup in Beaune) was that Papa loved it.   Mission accomplished.


Potage Crécy (Cream of Carrot Soup)
Serves 6 - 8

Ingredients:
5 to 6 carrots
1 small yellow onion
2 cloves garlic
1/2 tsp dried thyme (or 1-1/4 tsp. fresh)
1/4 ground nutmeg (or cardamom)
1/2 Tbsp. fresh squeezed lemon juice
4 to 6 cups chicken broth *
1 cup cream

Mise en Place:
  • dice carrots
  • dice onion
  • mince garlic
  • measure out herbs
  • squeeze lemon juice
  • measure chicken broth
  • measure cream
Method:
 Place carrots, onion, garlic, herbs, lemon juice and chicken broth in a medium stock pot.  Simmer until the vegetables are tender.  Pureé vegetables and broth in a blender, in batches, until smooth.  Return pureé to pot and add cream.  Re-heat and serve hot.

* Use enough chicken broth to cover the vegetables, then use more if you prefer it thinner after pureéing.

Tuesday, December 22, 2015

Classic Southern Squash Casserole


There are many, many squash casseroles out there; and I've probably tried most of them.  There is something about squash casserole that I love.  I don't know if it is the soft, creamy texture or simply the taste of the squash.  Most squash casserole recipes I've made over the years have been very good.  This particular one has found its way to the top of the ladder and is the only squash casserole recipe I use any more.

Paula Deen says that no southern cook is worth her salt without a good squash casserole recipe.  Well, all you southern cooks, this is it!  Put it in your repertoire.  It's creamy and souffle-like.  The ingredients are few and simple and it's truly southern. 

What sets this recipe apart from the others Ive made is that the squash is peeled.  I truly think that makes a difference; especially if you are stuck with thick-skinned squash.

The onion and squash slices will simmer in water until tender.  After you drain the squash you will mash it up with a fork.


In the same pan combine the mashed squash and onions, 1/2 cup of the cheese, the mayonnaise and the crackers.  You can make this recipe gluten free by using gluten free crackers.


Stir in the egg and the butter.  Salt and pepper to taste.

 
Turn into a prepared baking dish, sprinkle with the remaining cheese and bake until the cheese is melted and squash is bubbling.  Mmmmm....it's so creamy and good.

  Classic Southern Squash Casserole
Adapted from Paula Deen's Paula Deen & Friends, Living It Up, Southern Style
Yields 8 to 10 servings

Ingredients:
6 medium yellow summer squash (approximately)
1 small yellow onion
1-1/2 cups grated sharp Cheddar Cheese (about 6 ounces) - divided
1/2 cup Hellmanns Mayonnaise
10 soda crackers (saltines) - To make this a gluten free recipe use gluten free crackers
1 egg
2 Tbsp. salted butter
Salt and pepper, to taste

Mise en place:
  • preheat oven to 350°F..
  • spray an 8-inch square baking dish with vegetable oil cooking spray
  • peel the squash and cut into 1/4-inch slices
  • chop onion
  • grate cheese
  • measure out mayonnaise
  • place crackers in a plastic baggie and crush
  • crack egg and lightly beat
  • melt butter
Method:
Place the squash and onion in about 2 inches of salted water in a medium saucepan.  Bring to a rolling boil, then reduce the heat to medium-low and simmer until the squash is very tender, about 10 to 12 minutes.  Drain the squash.

In the same pot, mash the squash and onion with a fork; you should have about 2 cups of cooked squash.  Add 1/2 cup of the cheese, the mayonnaise, and the crumbled soda crackers.  Stir in the egg and butter.  Taste; add salt and pepper as needed.  Pour into the prepared baking dish.  Top with the remaining 1 cup cheese.  Bake for 25 minutes, or until the cheese is melted and the casserole is bubbly.

Thursday, December 10, 2015

Festive Cranberry Torte


It's been a very long time since I've posted a recipe; but, you know, life happens and it certainly has been happening to me lately.  Not complaining, just going with the flow.

It's the Christmas season and since life has been hectic lately I've had few opportunities to enjoy the Christmas season to the extent I usually do.  This is an oldie in my clipping files.  I have had this for a very long time.  When I originally cut it out I only cut out the photo from the magazine and I wrote down the recipe so I have no recollection what magazine it came from.  I actually remember the very first time I made it which was for a Christmas party in 1982 or 1983.  

I like to give credit where credit is due so I thought I would Google the desert (guessing the name was the original) in order to see if I could find the original source.  I found several links that posted the recipe with the exact same name and the exact same recipe (ingredients and wording of the directions and all) and photos that looked like the magazine photo I had cut out. 

So, with confidence, I can say that this recipe was a clipping from a 1979 issue of Better Homes and Gardens.  That mystery solved, let me share this recipe that is not only a tasty treat but it has lots of "curb appeal" on a Christmas buffet.


Start with making the crust.  It's a graham cracker crust with finely chopped pecans in it.  The recipe doesn't call for the crust to be baked but I think you could.  Once it's pressed into an 8 inch springform pan the crust is refrigerated while you prepare the rest of the torte.

One time I didn't have enough graham cracker crumbs so I combined them with ginger snap crumbs.  
 

 The cranberries get roughly chopped in the food processor.


The cranberries are then mixed with the sugar and left for 5 minutes to macerate.  They'll get nice and juicy.


 Add the egg whites, orange juice concentrate, vanilla and salt to the cranberry mixture.


Mix on low until frothy,


then, mix on high for about 6 to 8 minutes until the mixture is really, really stiff.


 In a separate bowl, whip the cream until you have soft peaks that flop over,


then fold the cream into the cranberry mixture.


Transfer to the springform pan and place in the freezer.  What is nice about this recipe is that you can prepare it the night before.  


 Your glaze starts out looking like this.


 This is what it looks like when it's finished.  

I like to cook the glaze slowly to allow the cranberries to lend their color to it.  Once it's thickened and the cranberries have popped and are squishy (there's a nice culinary term for you), I just slide the saucepan to the back of the range top and let it cool completely.  Don't refrigerate the glaze.


 When you are ready to serve your torte remove it from the springform pan and spread the glaze on top of the torte.  I normally, as the recipe recommends, decorate the top with thin slices of orange, quartered. 
 
Festive Cranberry Torte
From a 1979 issue of Better Homes and Gardens
Yields 8 to 10 servings

 Ingredients:
Crust
1-1/2 cups graham cracker crumbs
1/2 cup finely chopped pecans
1/4 cup granulated sugar
6 Tbsp. butter, melted

Filling
1-1/2 cups ground fresh cranberries (2 cups whole)
1 cup granulated sugar
2 egg whites
1 Tbsp. frozen orange juice concentrate, thawed
1 tsp. vanilla
1/8 tsp. salt
1 cup whipping cream

Glaze
1/2 cup granulated sugar
1 Tbsp. cornstarch
3/4 cup whole fresh cranberries
2/3 cup water
1 orange

Method:
In a mixing bowl combine graham cracker crumbs, pecans, 1/4 cup sugar, and the melted butter.  Press into the bottom and up the sides of an 8 inch springform pan.  Chill.

In the mixing bowl of a stand mixer, combine the ground cranberries and 1 cup sugar.  Let sit for 5 minutes to macerate.  Add the unbeaten egg whites, orange juice concentrate, vanilla, and salt.  Beat on low speed until frothy.  Then, beat at high speed 6 to 8 minutes or till stiff peaks form (tips stand straight up).

In a small bowl, using a hand mixer, whip the cream to soft peaks (tips curl over); fold into cranberry mixture.  Turn into the chilled crust.  Freeze until firm.

An hour or two prior to serving make the Cranberry Glaze.  In saucepan stir together 1/2 cup sugar and cornstarch.  Stir in the cranberries and water.  Cook and stir till bubbly.  Cook, stirring occasionally, until the cranberry skins pop.  Cool to room temperature.  Do not chill

To serve, remove the torte from pan.  Place on a serving plate.  Spoon the Cranberry Glaze in the center of the torte. Slice the orange into several 1/4" slices then quarter.  Place the orange quarters around the edges of the torte.