Showing posts with label potatoes. Show all posts

Monday, August 27, 2018

Party Potato Salad


This is the potato salad I've eaten most my life; my mom always made it like this.  I normally make it only for parties and celebrations.  This recipe will feed 15 - 20 people and is always good for those holidays that call for picnic fare.


The first task is to get the eggs and potatoes cooking.   They need to cool before everything is mixed together.

Cut the potatoes into cubes that are roughly 1 inch.  Carefully drop them in boiling water that has been salted with a good Tbsp. of salt.  You want your potatoes to come out mildly salted.

Once the water returns to a boil, lower heat and simmer until they are just fork tender. Start checking them after about 7 minutes and often after that. You don't want them to turn to mush.


Drain in a large colander.  I like to, lightly and politely, spray the drained potatoes with cold water.  Don't let the water come out of the sprayer at full force; your potatoes are tender now and you want them to retain their shape.  Let them stay in the colander to completely cool off.


Once your eggs are done, drain and re-fill pan with cold water and make an ice bath.


While the potatoes and eggs are cooking and cooling, dice up the rest of your ingredients.  I use Claussen Kosher Dills and using the Sandwich Slices makes it easy to dice them up. 


My dice are between 1/4 to 1/2 inch.


Same with your red onion; dice between 1/4 and 1/2 inch.


Using the egg slicer is the quickest way to get the eggs diced up.  Then you can take the knife to them to chop them up a little more.  


Pour your potatoes into a large bowl and add the pickles, onions and egg.


My hands are my best tools to mix up the potato salad without making mincemeat of the tender potatoes.  I always wear these.  These are my best friends.  


Cover your serving bowl tightly with plastic wrap and store in the refrigerator over night.  It is important to have your salad cooled before wrapping it up, otherwise you'll get condensation dripping into your salad.

Party Potato Salad

Ingredients:
1 dozen eggs
5 pounds russet potatoes

1 red onion, medium sized
1 - 12 ounce jar Claussen Kosher Dills - Sandwich Slices
1/2 cup pickle juice
1/2 cup Hellmann's or Best Foods Mayonnaise see NOTE below
1 Tbsp. classic yellow mustard
Salt and pepper to taste

 Method:
Boil, cool and peel eggs.

Peel potatoes and cut into 1 to 1-1/2" pieces.  Bring a large pot of salted water to a boil.  Add the potatoes.  When water returns to a boil reduce heat and simmer until the potatoes are just fork tender.  Check after 7 minutes for doneness.  You don't want the potatoes to become mushy. Drain the potatoes into a large colander and lightly rinse with cold water.

As the potatoes are cooling chop eggs, onion and pickles into 1/4" to 1/2" dice. Set aside.

In a small mixing bowl combine the pickle juice, Hellmann's and mustard.

When potatoes are cooled, place in a large mixing bowl and gently fold in the onion, pickles and eggs until just combined.  Preferably with your hands, gently mix in your mayonnaise mixture.  Make any additions (mayonnaise, pickle juice, mustard) to your liking and salt and pepper to taste.  

When the potato salad is completely cooled, cover with plastic wrap and refrigerate until very cold. 

**NOTE** in 2025 I started using Duke's more and more. Hellmann's has changed their recipe and have added ingredients and it is just not the same.  It makes me sad.

Thursday, March 19, 2015

Potato Pancakes


These conjure up memories of my childhood.  Never wanting to waste anything, my mother always made potato pancakes out of any leftover mashed potatoes we might have had.  We would usually get them for dinner but every once in a while we would find them on our plates at breakfast; which personally, was my favorite time to eat them.


It doesn't take many ingredients to make these creamy patties.  You have your mashed potatoes, of course; onion and cheese for flavor; egg and flour for binding.


Mix all of the ingredients together, blending with a fork.  Definitely taste before adding any salt.  I usually don't need to add any salt because I've corrected the taste when I made the mashed potatoes and, depending on the cheese you choose, that can add to the saltiness as well.  I always add a grind or two of pepper.


If making your 'batter' ahead of time you can form into 2-1/2" to 3" patties and place on a platter or a piece of wax paper.  Stick in the refrigerator for a little bit to firm them up. If not you can use an ice cream scoop and lightly flatten out with a fork once they hit the skillet


Sauté them in a little butter in a no-stick skillet.  Flip them over when golden brown.  Voila!  There you have a tasty treat and you've not wasted left over mashed potatoes.  And let's face it, re-heated left over mashed potatoes are n.e.v.e.r. as good as just-whipped.


 My favorite way to eat them....with an over-easy egg plopped on top of one.

Potato Pancakes
Makes 6 - 7 three-inch patties


Ingredients:
2 cups leftover mashed potatoes
1/4 cup minced onion
1/2 cup grated cheese (I use Vermont cheddar)
salt and pepper to taste
2 Tbsp. all purpose flour
salt and pepper to taste
1 egg
butter

Method:
Break up the potatoes with a fork.  Mince the onion; add to potatoes.  Grate the cheese; add to potatoes.  Combine the mixture with a fork.  Salt and pepper to taste

Add the flour to the mixture and mix thoroughly.  In a small bowl lightly break up the egg with a fork and add to potato mixture.  Mix the potato mixture until the egg is incorporated.

Melt a small amount of butter in a non-stick skillet.  When butter is bubbling add potato mixture to the skillet using a 1/4 cup (size 16) scoop, spreading potatoes out slightly, and let cook until brown.  Flip over and allow to brown on the other side.


Monday, September 29, 2014

Giving the Leftovers a Makeover


 For the most part I love leftovers.  Sometimes, however, foods aren't nearly as good as they were at their original cooking.  Take for instant a baked potato.  The white meat of that tuber will never be soft and fluffy as it was the night before.


corn on the cob is hard to get excited about as it was when you took it off the grill last night.


this is how I rescue leftovers to give them a second life.

peel the baked potato and slice in 1/2 inch slices, then slice those in half

slice the corn kernels off the cob

slice up half a yellow onion

and slice up a couple cloves of garlic


Melt the butter until browned then add the onions.  With a wooden spoon or utensil of your choice, delicately separate the onions.  Cook these over medium low heat until soft and limp.


Add the corn


Add the potatoes and the garlic


Sprinkle a pinch of smoked paprika over the top and gently stir.

Salt and pepper to taste.

With your wooden spoon scrape up the fond that will accumulate on the bottom of the pan and fold it in with the vegetables  This will really add flavor to the vegetables.


Mmmm.  The potato becomes creamy, the corn still pops and lends a little sweetness, the onions and garlic lend their flavor and the paprika gives it a little smokiness


Leftover Veggie Hash
Serves 4


Ingredients:
3 Tbsp. salted butter
One medium baked potato
1 medium roasted corn on the cob
1/2 medium yellow onion
2 to 3 small garlic cloves
pinch of smoked paprika
salt and pepper to taste

Mise en place:
  • slice off butter and place in saute pan
  • peel baked potato and slice cross-wise into 1/2 inch slices, then cut those in half
  • shuck corn and with a sharp knife slice down cob from top to bottom to remove kernels
  • peel and slide 1/2 yellow onion, slicing this from the side, not the end
  • peel and slice garlic cloves
Method:
Heat butter in saute pan.  When the butter begins to turn brown add the onions.  Cook over medium low heat until they become limp and start to brown.  Toss in the corn and combine.  Then add the potatoes and the garlic.  

Allow the vegetables slowly heat up and take on a nice color.  Sprinkle the smoked paprika over vegetables then salt and pepper to taste.

Friday, March 15, 2013

Crispy Oven Fries


For many years when I have endured numerous kitchen conundrums Cooks Illustrated has come to my rescue.  CI has to be one of my favorite food magazines because there is no paid advertising so when they test something or recommend a product, whether it be food stuffs or equipment, it is truly their opinion; not some manufacturer paying for their endorsement.  And they know their stuff.  The other reason is because they do all the hard work of testing and trying and figuring out why something does or doesn't work.

I spent years and countless pounds of potatoes trying to produce a good crispy oven 'fried' potato. Most of those attempts produced potatoes that were either limp, underdone, overdone or so crispy they resembled a piece of coal.  I just couldn't find the right formula for making them as good as deep fried potatoes; tender on the inside and crispy on the exterior.  I wanted the taste and texture without all the oil.  The solution was handed to me on a silver platter in the form of an article in the January/February 2004 issue of Cook's Illustrated.

Particular steps became very key to transforming my oven fries from soggy and mushy to crispy perfection.  It may seem, at first, that there are so many frivelous steps taken just to get a good oven fry.  It is so worth it, however.   After a couple of times using this method you will be making them in your sleep and your family members and guests will praise your name and demand more fries.

I'm going to share with you some of the knowledge I gleaned from the article that made my oven fries creamy on the inside and crispy on the outside.

To begin, let's talk about the potatoes.  Russets beat out all the others for fries.  I also elect to peel the potatoes rather than leave part of the peel on.  Skins off they had more of that original french fry taste.


Once the potatoes are peeled I like to slice mine thin, but cutting them into thick wedges is perfectly fine too.  Soak them in ice cold water for about an hour.  After 30 minutes you will notice the water is all cloudy.  This is starch that is being leached out of the potato.  Pour this off, rinse and re-cover with fresh ice cold water and stick the bowl back in the fridge.  Starch prohibits moisture from leaving the potato; and you want some moisture to leave the potato so it can become crispier.


Since we've had the potatoes soaking to remove some of the starch, we now have to make sure we get the potatoes dry.  Forget about tamping the moisture off of them with mamby pamby paper towels.  Grab a good, thick kitchen towel, lay them out in a single layer and pat them dry then let them sit there while you prepare the pan.


 I found it interesting that in the CI testing using a heavy baking pan made a big difference. I used to grab an older, light weight jelly roll pan instead of using my better, heavier pans. CI stresses that a heavier pan is best.  A lightweight pan yielded fries that were either pale or burnt; or rather inconsistent. The heavyweight pan produced even browning because it conducts heat better.

In the past even though I tossed the potatoes in a bowl with olive oil my potatoes always stuck to the pan horribly.  Now, I cover the bottom of the pan with parchment paper and spread about 1 Tablespoon of vegetable oil over the parchment.


Sprinkle a light sprinkling of Kosher salt on the surface of the parchment.  CI stated that this aided even more to prevent sticking with the salt particles acting like little ball bearings suspending the potato slice from the pan.  Whatever....I actually rolled my eyes at this statement but thought what the heck, I'll try it.  Turned out to be a great idea.  Worked like a charm.


Arrange the potato slices so they are not touching.  Most likely you will need more than one pan so you do not crowd the potatoes.  Just giving you a heads up.


Slightly steaming the potatoes aided in giving them a creamy interior.  Cover the pan with aluminum foil and place them on the very bottom rack in the preheated oven.

Adjusting the rack to the lowest position made a big improvement for the fries due to the intense heat from the bottom of the oven browning them quickly and evenly.


Potatoes were steamed this way for about 5 minutes then the foil was removed. Bake the potatoes uncovered for approximately 10 minutes then turn the pan around for another 10, or until they are golden and crispy.

So, here's how you can make good crispy oven fries for yourself.  Now, go out and get yourself a subscription to Cook's Illustrated.  It'll do your kitchen good.


Crispy Oven Fries
Adapted from Cook's Illustrated - January/February 2004
Serves 3 to 4


Ingredients:
3 russet potatoes (about 8 ounces each)
2 to 3 Tbsp. vegetable or peanut oil
Kosher salt and black ground pepper

Method:
Peel potatoes.  Slice lengthwise into 1/2" to 3/4" slabs.  Slice each slab lengthwise into thin sticks.  Place potatoes in mixing bowl and cover with cold water.  Place in refrigerator for about 30 minutes.  Drain and rinse starchy water off potatoes and cover with fresh cold water.  Place back in refrigerator for another 20 - 30 minutes.

Drain potatoes and lay out on heavy kitchen towel.  Thoroughly pat dry and allow to sit and dry while you prepare the pan(s) and preheat the oven to 475 degrees F.

Line heavy 18 x 12-inch heavy-duty rimmed baking sheet with parchment paper. Spread 1 Tbsp. vegetable oil on parchment paper. Sprinkle parchment with light coat of kosher salt.
You will most likely need to prepare two baking sheets so your potatoes are not crowded (that is what the 3rd Tbsp. of oil is for).

Rinse and wipe out the empty mixing bowl; return potatoes to bowl and toss with remaining 1 Tbsp. of oil.  Arrange potatoes in single layer on prepared baking sheet; cover tightly with foil.  With the oven rack placed on the lowest position, bake for 5 minutes.  Remove foil and continue to bake for 15 to 20 minutes more, turning baking sheet after 10 minutes, until potatoes are spotty golden brown.

Transfer potatoes to a second baking sheet lined with paper towels.  Season with additional salt and the pepper to taste.

Sunday, August 12, 2012

Mushroom Potato Crema with Roasted Poblano

It's 'Feel the Heat' week at I Heart Cooking Clubs.  Well, we're sure feeling the heat in Texas this summer!  We hit 106° the other day so I thought I'd make a nice hot soup; you know, just to take the chill off.

The heat never deters me from making soup; even when the soup contains a little added heat with chilis.

Chicken broth, potatoes, mushrooms, garlic, corn, poblano chile, yogurt, rosemary and cilantro all come together to produce a soup that's earthy with a hint of sweet from the corn and spiced up with roasted poblano.

At first taste, I wasn't a big fan, but my mind was completely changed after the garnish of fresh cilantro had a little time to do its magic.

Mushroom Potato Crema with Roasted Poblano
Adapted from Rick Bayless' recipe as it appears on his website
Makes a generous 6 cups serving 4

Ingredients:
4 medium (about 1 pound total) red-skin boiling or Yukon Gold potatoes (I used Yukons)
3 garlic cloves
6 cups chicken or vegetable broth (I used chicken broth)
1 large fresh poblano chile
8 ounces mushrooms ( I used a combination of shiitake and enokidake)
1 scant cup corn kernels (frozen or fresh off 2 cobs) (I used fresh)
1 large sprig fresh epazote (I substituted 1 sprig fresh thyme)
1/4 cup plain yogurt, heavy cream or sour cream (I used yogurt)
salt
1/4 cup roughly chopped cilantro, for garnish

Mise en place:
  • roast poblano chile over open flame or 4 inches below a broiler then place in a plastic baggie while prepping the rest of the ingredients (I demonstrate how I roast mine in this post)
  • measure out broth
  • peel cloves and slice in half
  • remove kernels from ears of corn (here's my handy way of coralling those kernals)
  • measure out yogurt
  • roughly chop cilantro
  • peel potatoes and cut roughly into 1-inch pieces
  • rub the blackened skin off the chile and pull out the stem and seed pod.  Rinse the chile flesh to remove bits of skin and seeds.  Cut into 1/4-inch pieces
Method:
Scoop the potatoes and garlic into a medium (3 quart) saucepan, pour in half of the broth and set over high heat.  When the liquid boils, reduce the heat to medium and simmer briskly until the potatoes are tender, about 15 minutes.

When the potatoes are tender, use an immersion blender to puree the soup base (or blend in batches in a food processor or loosely covered blender draped with a kitchen towel and return to the pan).

Add the remaining half of the broth, the mushrooms, poblano, corn and thyme.  Simmer 10 minutes over medium heat.

Just before serving, scoop out about 1/2 cup of the hot soup into a small bowl.  Mix in the yogurt.  Stir the mixture back into the pot, then taste and season with salt, usually about 1-1/2 to 2 teaspoons.  Ladle the soup into bowls and sprinkle with cilantro.

I'm sharing this recipe at IHCC

Wednesday, May 30, 2012

Potatoes au Gratin 101 - Potatoes Dauphinoise

Mmmm, creamy, melt in your mouth potatoes.  Potatoes Dauphinoise is the French method of baking potatoes in milk, cream and cheese. A type of grain that is regional in the Region of Dauphiné France, where in the French Alps (the origin of this recipe) you would be cooking the potatoes in earthenware pots on the hearth.  

My go-to recipe comes from this cookbook that I've had for about 17 years.  It is a collection of recipes by Monique and Patrick Esquerré.  Patrick founded the la Madeleine French Bakery in Dallas in 1983 (no, the Basil Tomato Soup recipe is not in this book).  Monique is his mother and is a cookbook author in France; and these are her, and generations of her family before her, recipes.   This recipe is just one of the many reasons I love this book.  It's not only full of unbelievably fabulous recipes from the Loire Valley of France; it's also an interesting read.

This past weekend Lovey and I went to Jim and Amy's for a Memorial Day celebration.  It's always fun to fellowship at their home.  There is always good food, good wine, and great friends and family.  The best part is sitting around their big table and eating, laughing, and telling all sorts of stories.

But before I get to the recipe this is why getting together with a lot of family is just so much fun right now...Babies.  And right now we have two of the cutest!

Luke


And Eva

One of the dishes Lovey and I brought to the celebration were these potatoes.  And let me tell ya, if you want people's eyes to roll back in their heads and ask who made the potatoes, just make these...but make a lot!

Here are some reasons this recipe is fun to make....


You get to use really dangerous pieces of kitchen equipment:
Slice the potatoes thin.  See how perfect mine are?  I just have this fabulous skill with knives.  Not really.  I use a mandoline; which is a very handy tool in the kitchen.  But NOT one to teach your toddler how to use.  Sacre bleu, I know adults I wouldn't allow near this piece of equipment!  It is S.H.A.R.P.


You get to slather your gratin dish or baking dish with soft butter then rub it down with sliced garlic:
And just think, these flavors will seep into the potatoes as they bake in the oven.


You get to use the too cute mini grater that's used for grating whole nutmeg and whole nutmeg only:
Christanne gave it to me.  I love it.  It even lives in the spice drawer next to the tin of nutmeg.


You get to BOIL milk and simmer cream:
Now, I ask you...how many recipes actually let you to boil and then simmer the milk and cream.  And what's even better, the potatoes are slowly simmering in this heavenly concoction.

I think I've given you enough reasons to make this, just for these cooking pleasures alone.  Wait until you experience the pleasure of eating these!


Here they are on Jim and Amy's table, waiting to be devoured.  As you can see someone has been sampling before the meal got under way...that was me.  And, it was at my house way before we loaded it into the car.  I just couldn't wait.  And since I am the cook, I can do that.


Potatoes Dauphinoise
From From a French Country Kitchen by Monique Esquerré and Patrick Esquerré
Serves 4

Ingredients:
1 bay leaf
1 cup of milk
4 Tbsp. unsalted butter, divided use
Salt to taste
Freshly ground white pepper to taste
Grated fresh nutmeg to taste
1 cup heavy cream
1 pound potatoes
1 clove garlic
2/3 cup grated Gruyère cheese


Mise en place:
  • measure out milk into a Dutch oven
  • peel potatoes and slice very thin (don't rinse any of the starch off the potatoes; it is needed to help thicken the gratin)
  • peel garlic and slice in half, lengthwise
  • measure out cream
  • grate cheese
Method:
Boil milk with bay leaf in saucepan, taking care not to let it boil over.  Preheat oven to 325°F

Add 3 Tbsp butter, salt, pepper, grated nutmeg, cream, and potatoes to the pan with the hot milk.  Simmer, stirring from time to time with a wooden spoon to separate potatoes.  Cook 20 minutes or until just tender.  Remove from heat and set aside.

Grease an au gratin dish with remaining 1 Tbsp. of butter.  Rub dish with cut piece of garlic.  Pour in potatoe mixture and sprinkle with grated Gruyère cheese.

Bake potatoes for 40-45 minutes.  If surface of potato mixture is not browned sufficiently, place under broiler for about 3 minutes.  Remove and let cool for 5 minutes before serving.

French Maxim -
To invite people into your home is to take charge of their happiness during the time they are under your roof.

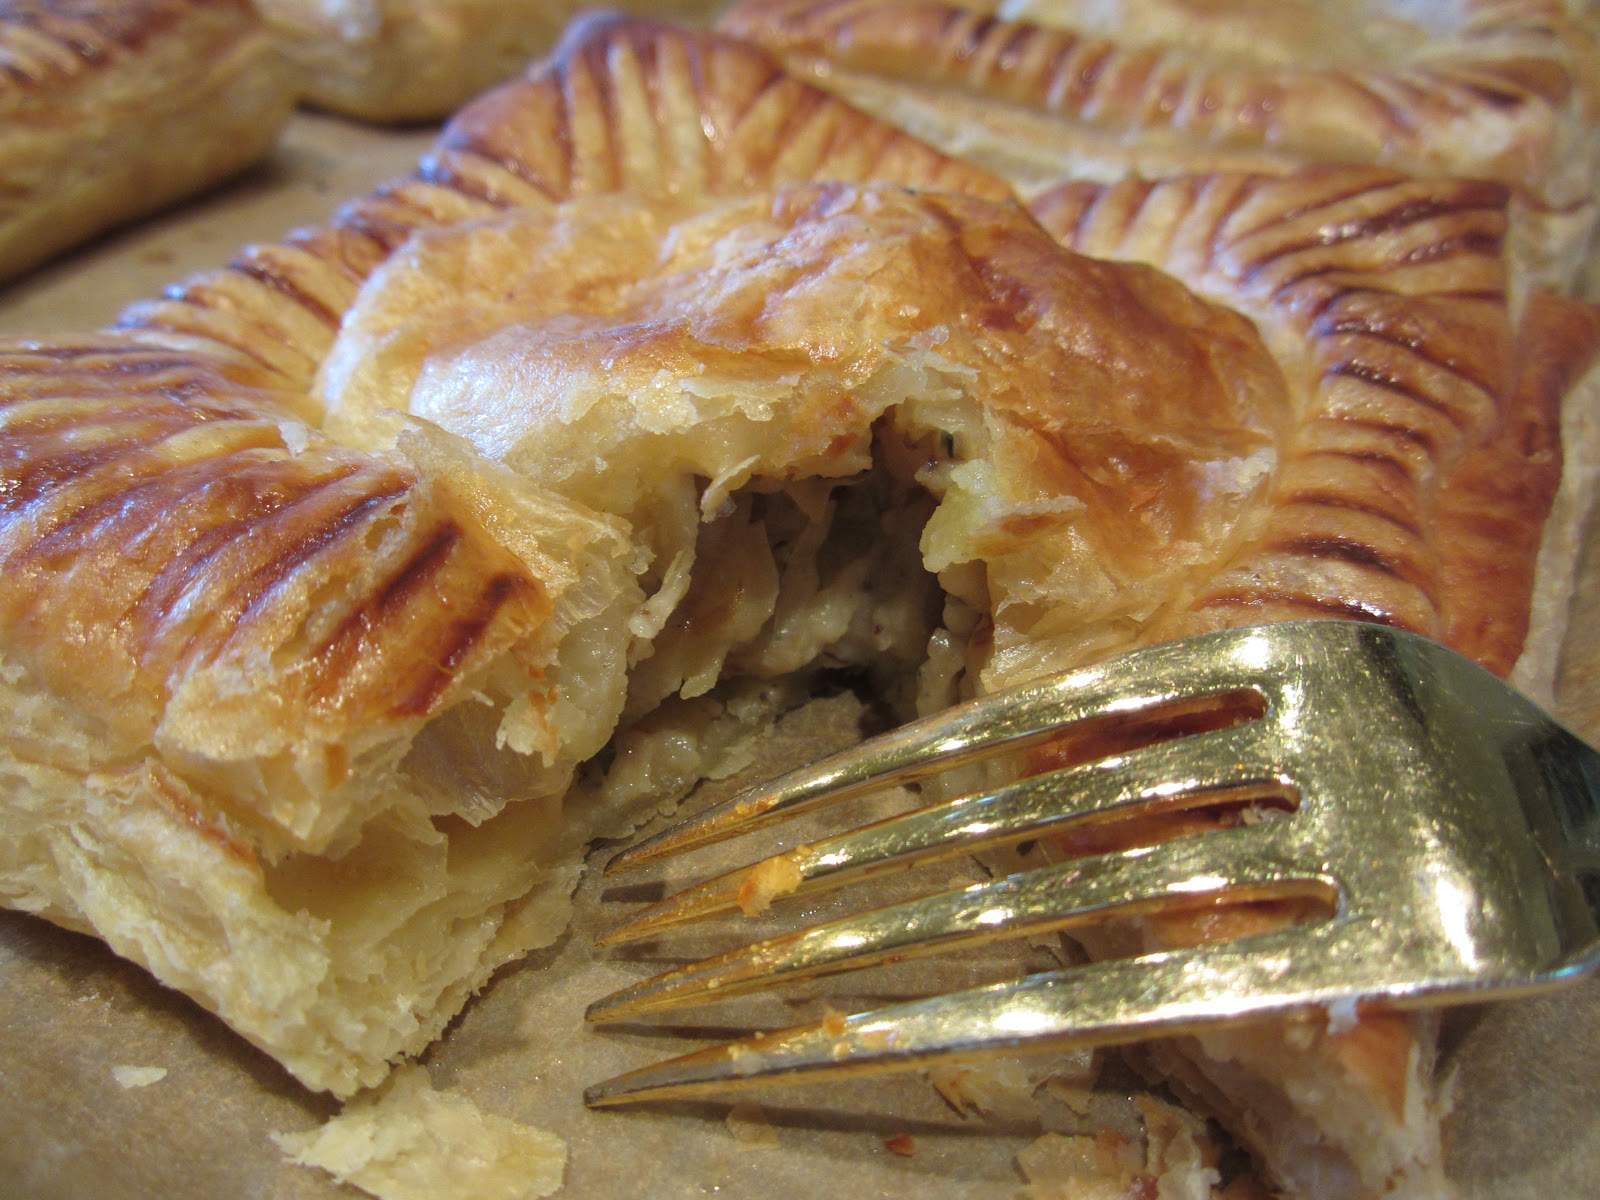
Potato Stuffed Puff Pastry Squares

If you are looking for a nice side dish, especially for a chicken entree, I think you will like this one.  It would also be nice for brunch served alongside a tossed salad.

It's seasoned to pair well with poultry, it's not difficult to prepare and can be prepared ahead of time, it's filling, and will give your plate an elegant flare.

This clipping was pulled from a Winter of 1997 Penzey's spice catalogue.  The ingredients call for Italian Herb Mix.  If you don't have one already you can always make your own.  You have a wide choice of herbs to pick from; oregano, basil, marjoram, thyme, sage, and rosemary.  You don't have to have all of those in your blend; in fact, for this particular recipe, if your rosemary is not finely ground I would omit rosemary from your blend.  There just isn't enough cooking time and moisture in this to soften the rosemary; you don't want to bite into what feels like tough pieces  of grass.  It's a texture thing with me.

One suggestion might be 2 tsp. each of basil, marjoram and oregano and 1 tsp. of sage.  Blend that together and you'll use 2 tsp. of the blend in the recipe.


A very important step in this recipe is to eliminate the moisture from the potato and broccoli mixture once they are tender.  The last thing you want is an overly moist, runny stuffing.

There are leeks and mushrooms that nicely flavor the stuffing.


Throw the leek & mushrooms in with the potato/broccoli mixture along with the herbs, part of the milk & Parmesan cheese.


Grab a potato masher and take your pent up frustrations out on your stuffing.  I like it somewhat chunky but you can make it as smooth as you like.


Placing the stuffing and fontina on the pastry squares


 Sealed, painted with the egg-milk mixture and ready for the oven.


 Notes:
See how I shaped the mounds of stuffing into a round mound?  You can also make them square.

I had a good 1/2 cup of filling left over.  I could have used a little more in each square but the recipe suggested to err on the side of too little stuffing.  So I erred.

I was afraid the filling was going to be too dry, but the fontina added just the right amount of moisture and flavor.

Make only what you need.  Puff pastry is just not the same as a leftover.


Potato Stuffed Puff Pastry Squares
Adapted from Penzey's
Serves 4


Ingredients:
1 lb. (2 sheets) puff pastry, frozen
1 medium potato
1/2 cup broccoli stems
2 tsp. Italian herb mix
1/2 tsp. granulated garlic
1 Tbsp. water
1/4 lb. mushrooms (a large handful)
1 regular-sized leek
2 tsp. olive oil
4 Tbsp. milk, divided
2 Tbsp. Parmesan cheese
1/2 tsp. ground black pepper
1/4 tsp. salt
1/4 lb. fontina cheese
1 egg


Mise en place:
  • remove puff pastry sheets from the box and inner bag, let thaw at room temperature while preparing stuffing
  • peel & quarter potatoes
  • peel the stems (also known as 'trunks' when I was a wee lass) of the broccoli and chop into small pieces
  • combine the herb mix, garlic & water and set aside
  • with a paper towel, wipe mushrooms clean and roughly chop
  • slice the leek in half lengthwise.  Peeling back layers, rinse thoroughly to remove any sand.  Slice white part only into thin slices
  • measure out 2 Tbsp. milk
  • grate Parmesan cheese
  • slice fontina in 1/4" thick slices
  • beat egg in small dish with remaining 2 Tbsp. milk
Method:
Preheat oven to 400°F.  Cook potato in boiling salted water until tender, about 10 minutes.  Toss the broccoli pieces in with the potatoes during the last 5 minutes of the potato's cooking time.

In a large fry pan, heat the olive oil over medium heat.  Add the mushrooms and leeks.  Cook, stirring, until the mushrooms and leeks are soft and just a bit golden, (about 4 minutes), remove from heat.

Drain the water from the potato and broccoli.  Cover pan with a lid and let dry over low heat for a minute.  Remove the pan from the heat.  Add the mushroom/leek mixture, the 2 Tbsp. reserved milk, Parmesan cheese, the herb mixture, salt & pepper.

Mash with a hand masher until the desired consistency is reached (a little chunky is nice, but you can make it totally creamy if you like).  Let cool a bit.

Line a baking sheet with parchment paper so the pastries don't stick during baking.

Lightly flour a work surface large enough to spread out the two sheets of puff pastry.  Lay the pastry out, sprinkle with flour and roll lightly with a rolling pin just to even out the creases.  Turn the pastries over, sprinkling a bit more flour on the work surface if the dough seems to be sticking.  Divide each large square into four equal smaller squares.

Place a large spoonful of the stuffing mixture in the middle of four of the pastry squares, leaving the outer inch of pastry bare.  Top each mound of stuffing with two slices of fontina cheese each.

Working with one square at a time, brush a bit of the egg-milk mix around the outside edge of the dough (using a pastry brush), and place another square on top, gently molding the square around the top and base of the stuffing.  Run your finger around the outside edge to seal the two pieces of dough together.  The object is to have as much stuffing on the inside as possible, without having so much that you can't get a good seal on the dough and the filling oozes out during cooking.

After filling, topping, and lightly sealing the edges of all four squares, press for tines around the edges in a nice pattern, making a good seal.  Poke a hole in the top with the fork, then brush the entire top sheet with the egg-milk mixture.

Using a spatula, place the pastries on the baking sheet and into the oven for about fifteen minutes, until golden brown.

Remove the pan from the oven and the pastries from the pan, using a spatula, then let cool for a few minutes before serving.