A great condiment for burgers, sandwiches, salads, or simple snacking.
Saturday, May 9, 2026
Pickled Avocado
Sunday, December 20, 2020
Roasted Salsa Verde
Easy, great to dip a chip in, or to use in other recipes.
Cut the tops off the jalapeños and scrape out the seeds and veins. Toss them into the bowl with the other vegetables. If you like the tomatillo sauce really hot, leave the veins and seeds in.
Throw in a large handful of fresh cilantro leaves into the bowl. Using an immersion blender mix everything together. Process to the consistency you want. Sometimes if I use it as an ingredient for another recipe I will leave it a little chunkier; smoother if using for a salsa dip or topping. Salt to taste.
Makes approximately 2 cups. You can store in the refrigerator for a couple of days. It will probably thicken up so add a little water and re-heat before using.
Thursday, October 1, 2020
Mother's Giblet Gravy
A simple, basic recipe for Thanksgiving gravy. This must be served whenever turkey, mashed potatoes, and dressing are on the menu; it's the law.
When you prep the turkey, remove all the giblets. Rinse them off, place them in a sauce pan and cover with water. Add a carrot, some celery, and half an onion. season the water with salt and pepper.
I also add the egg(s) to water so they can hardball while the giblets are cooking.
When the water comes to a rolling boil, skim off any nasty looking foam. Reduce the heat to a gentle simmer and forget about it for about 30 minutes.
Check the doneness of the giblets, turn the heat off and strain the solids. Return broth to the sauce pan. When they are cool enough to handle, dice up the giblets and hard boiled egg and reserve in a small bowl until it is time to add to your finished gravy.
When your turkey is done, and removed from the roasting pan to rest on a platter, strain any solids off the bottom of the roasting pan and add the clear juices to the broth.
Add corn starch - 1 Tbsp. for every cup of broth, to a ball jar. Bring the broth to a boil. Prior to it coming to a boil but still warm, add enough broth to the corn starch and begin to blend it with a fork. Put the lid on the jar and carefully (with a towel covering the lid) shake up your slurry until completely smooth. Set aside.
Once the broth is at a rolling boil, give the slurry a shake to re-mix and slowly add, in a small stream, to the broth while whisking. The gravy should thicken almost immediately. Lower the heat and bring to a gentle simmer for several minutes. Add your chopped giblets and eggs and allow to warm through.
Some Notes to Consider Before Making Your Gravy:
When prepping and seasoning your turkey for roasting, take into consideration that what you put in the roasting pan and the turkey may affect the taste of your gravy. I don't use anything sweet, such as fruits, because they simply don't make a tasty gravy. I like to use lots of carrots, onion, celery, garlic cloves and springs of fresh thyme or rosemary in the roasting pan. I usually put lemon and onion inside the bird. I use LOTS of seasoned butter under the skin of the bird.
If you need/want more gravy than your broth and juices combined make, use some boxed chicken broth to bring your broth to the desired amount that you want.
Do NOT add the dry corn starch directly to the boiling broth. It will become a lumpy mess that you cannot fix and you will hate yourself. I speak from experience. ALWAYS make your smooth slurry in a jar first.
If you don't like the giblets/egg in the gravy, the gravy is still delicious on it's own.
Sunday, September 8, 2013
Brussels Sprouts Kimchi
Last year I participated in a challenge set forth by these guys and I was assigned Crepes Suzette. This year Zach and Clay have thrown out a Cover to Cover Challenge by having their readers make all of the recipes in the September issue of Bon Appetit. I naturally signed up again and was anxious to see what recipe I was assigned.
I have to be honest here and was kind of bummed when I saw I was given the challenge to make Brussels Sprouts Kimchi. Hmmmm, well, uh, OK. After my initial and personal and selfish, pouty response to my assignment I decided to embrace the Kimchi. I was going to have fun with this; after all, that is why I enjoy participating in things like this.
I've never eaten Kimchi, which is traditionally made with Napa cabbage. I've always thought it looked really nasty in the jars on grocery store shelves and although I'm not shy when it comes to spicy, I've heard this stuff is really, really H-O-T. I know it's the national food of Korea and that's about the extent of my knowledge. How do you eat this stuff? Is it a condiment? Would my friend who eats pickled herring right out of the jar with her fingers do the same with Kimchi???
The only difficulty I had with this challenge was finding one of the ingredients. Pointedly, this stuff. Gochugaru, a coarse Korean red pepper powder was difficult to track down. They didn't have it at Central Market. It wasn't carried at Penzey's, and it was nowhere to be found on the shelves at Whole Foods. I did a little investigative work and discovered it was going to be hard to substitute because the key in this spice was not that is was red pepper powder, but that it is coarse ground red pepper so cayenne, for instance, wouldn't be a good substitute.
I tracked down a great (and huge) Asian Market called Super HMart in a suburb of Dallas. and took a little field trip on my lunch hour. This place was amazing. I couldn't understand any of the signage so I showed a helpful lady the recipe and the spice I was looking for and she pointed me in the right direction. With my new found ingredient under my arm I was anxious to whip this recipe out.
The base, of course, is small, tender Brussels sprouts. After washing, trimming, and cutting in half they were soaked in a brine for 4 hours.
A plate is placed on top of them to keep them submerged.
These are all of the good things that will become a bright red, hot, spicy paste.
The onion, scallions and garlic are roughly chopped and the ginger is roughly grated
Then they are dumped in the food processor bowl and all of the other ingredients are tossed in as well.
The mixture is pulsed until you have a bright red paste.
The Brussels sprouts are drained from their brine and rinsed off. The canning jars, lids and rings were boiled for about 10 minutes just to make sure everything was sanitary.
The Brussels sprouts were tossed with the chili paste then packed tight into the quart jars.
Pickling liquid is poured into the jars and they are sealed.
The jars are then set in a cool place away from direct sunlight to ferment for 3 to 5 days.
I haven't tried this condiment since it is still in it's fermentation stage but I am encouraged to try it solely from the enthusiasm from my neighbor Martha who was excited to take a jar home to enjoy. Kimchi is her friend and she thought this looked and smelled heavenly. I will be honest that I am hesitant about trying this. I know for a fact that Lovey won't have anything to do with it because of it's spicy nature.
At the right time I'll give it a try and let you know what I thought of it and how Martha and her family liked it. One of the pleasures in life is to try new things. It doesn't mean that we have to like everything but at least we've tried them.
Brussels Sprouts Kimchi
From the September 2013 issue of Bon Appetit
Makes 2 quarts
Ingredients:
4.25 ounces kosher salt divided
3 quarts water divided
1-1/2 lb. small Brussels sprouts
1/2 small yellow onion
2 scallions
4 garlic cloves
1/4 cup gochugaru (coarse Korean red pepper powder)
2 Tbsp. Sriracha
1 Tbsp. grated ginger
1 Tbsp. soy sauce
2 tsp. coriander seeds, crushed
2 tsp. fennel seeds, crushed
Method:
Wash and trim the stems of the Brussels sprouts and cut them in half. In a large mixing bowl mix 3.5 ounces of salt with 2 quarts warm water. Whisk until the salt is dissolved. Add the Brussels sprouts and place a plate on top of them to keep them submerged in the brine. Let them sit at room temperature for 4 hours.
While the Brussels sprouts are in the brine measure out and prepare all other ingredients.
Peel and coarsely chop the onion. Slice the scallions. Peel and crush the garlic. Peel and grate the ginger. Crush the coriander seed and the fennel seed.
After the four hours of soaking in the brine, drain and rinse the Brussels sprouts. Place them in a large mixing bowl.
In the bowl of a food processor, place the onion, scallions, garlic, gochugaru, fish sauce, Sriracha, ginger, soy sauce, and coriander and fennel seeds. Pulse until smooth. Add to the bowl with the Brussels sprouts and toss. I would suggest wearing kitchen gloves and tossing with your hands. Pack the mixture to two 32-ounce canning jars, packing down to eliminate air gaps.
Combine the remaining .7 ounce of salt and 1 quart warm water in a large bowl, whisking to dissolve the salt. Pour this pickling liquid into the jars to cover the Brussels sprouts, leaving at least 1 inch headspace. Cover jars with lids. Let sit out of direct sunlight at room temperature for about 3 to 5 days. The kimchi should taste tangy and releases bubbles when stirred. Chill.
This recipe can be made and kept chilled for 2 months.
Friday, March 16, 2012
Herbed Olive Oil
Tessa suggests that it is worth making a large amount as it keeps for a long time if the herbs remain covered with the oil. Since it is only Lovey and myself at home, I halved the recipe (as I do with so many these days). Smear it all over a nice chicken for roasting and you can jazz up your roasted potatoes as well by giving them a nice toss with the oil before placing them in the oven. Spread some of the oil mixed with diced tomatoes on some toasted ciabatta bread for a nice bruschette. You can get really creative with this stuff.
Wash your rosemary and sage and leave to dry overnight on some paper towels.
Remove the leaves from the rosemary sprigs and remove any tough stalks from the sage sprigs. Peel your garlic and coarsely chop (if you go the blender route). Drop them into your blender and pulse-chop. My blender didn't do as good a job as I would have liked on the rosemary leaves but it chopped most of them fine and the leaves left whole were at least bruised and beat up enough to release their essence. If you do this by hand, chop them very finely.
I put my herbs in a Mason jar (because I love storing all things in Mason jars) and added a good pinch of salt.
Add a good quality olive oil and stir it up. Let it settle overnight then check to make sure all of the herbs are still covered.
Store in a cool, dark place or in the refrigerator. I'm keeping mine on my pantry shelf with it's cousins.
Smicca - Herbed Olive Oil
From Twelve by Tessa Kiros
Makes 1litre (4 cups)
Ingredients:
4-1/2 ounces rosemary sprigs
3-1/2 ounces sage sprigs
4 garlic cloves garlic
about 3 cups olive oil
Mise en Place:
- rinse rosemary and sage and allow to dry, preferably overnight
- strip leaves from rosemary and sage sprigs
- peel garlic
- measure olive oil
Chop the sage, rosemary leaves and the garlic very finely by hand, or pulse-chop in a blender. Place in a jar, lightly salt and cover with oil. Stir through. Leave it overnight to settle, then check that the herbs are completely covered with oil. Add a little more oil if necessary. Store in a closed jar in a cool, dark place or in the refrigerator. This will keep for several months - just keep topping it up with olive oil.
I'm sharing this at IHCC
Wednesday, March 14, 2012
Moroccan Preserved Lemons
This is how I learned to make them.
The containers.
Select your container or containers, depending on how much you plan to make. I prefer glass jars (clamp/gasket or Ball jars). Wash and sterilize them. I scrub mine by hand then boil them in a large pot of water for about 10 minutes.
Unless I am making gifts, I make just one jar to keep in the fridge. Once my jar is clean and dry I toss a little kosher salt into the bottom of it.
The lemons.
Any lemon will do but choose unwaxed organic lemons. I prefer Meyer Lemons with their deep yellowy-orange skin that's thin and fragrant. It's juice is also a little sweeter and less acidic than a true lemon. Select enough lemons to cram the jar full. You'll want to buy extra lemons for juicing as well.
Cut each lemon through the center 3/4 of the way through making sure to keep intact. Turn a half turn and make another slice 3/4 of the way through the lemon.
The lemon should look like this. You'll have a quartered lemon that is still attached at the base.
Have a bowl full of kosher salt on hand and start packing your lemon with the salt. As you finish packing a lemon, place it in the jar.
Repeat with the rest of the lemons until you have crammed the jar full. As you stuff the lemons in the jar, you will want them packed in really tight and compress them so you release juices.
Over time, juices will naturally begin to release themselves but you will want to juice several lemons and pour the juice into the jar.
I also added a couple of sprigs of fresh thyme I had on hand.
The lemons can be stored on a shelf in a dark cool closet but I prefer the refrigerator. Every two to three days for the first week, open the jar and compress the lemons, releasing more juice. After a week, if the lemons are not completely submerged in the juices, juice another lemon or two and add the juice to the jar.
Walk off and forget about the lemons. I don't even think about them for at least two months.
Uses:
- remove the soft rind and mince it to add to salads
- separate the rind and pulp and smear all over a roasting chicken and throw some inside the chicken too.
- the rinds can be used in sauces (whole or chopped up)
- you can use your lemons to flavor any savory dish
- give them as gifts
Moroccan Preserved Lemons
The ingredients will vary depending on the size of your jar, the size of the lemons and how many jars you plan to make. For the sake of giving you a guideline, I'm giving you the ingredients I used to fill a 2 cup gasket and hinge jar.
Ingredients:
8 Meyer Lemons, divided
1 cup Kosher Salt (you won't use all of this but it's better to have alot on hand than not enough!)
Fresh herb sprigs (optional)
Mise en Place:
- Scrub jar and boil (without the gasket on) in a large pot of water (enough water to cover jar) for about 10 minutes - dry thoroughly
- wash lemons and set aside
- squeeze lemon juice from 2 of the lemons
- pour salt in small mixing bowl
Drop a good pinch of salt in the bottom of the jar.
Slice 6 of the lemons in quarters 3/4 of the way through - all 4 sections should stay intact.
Take fingerfuls of salt and pack into the lemon. Place into the jar. Repeat with each lemon and as you pack them into the jar, use pressure to compress the lemons together and exude juices. Once you have packed your jar full (I packed 6 lemons into my jar) slip in whatever herb you like (if you choose to use an herb at all). Pour the lemon juice that you squeezed from the 2 lemons into the jar.
Replace gasket onto the jar lid the clamp the jar closed. Place in refrigerator. Every 2 to3 days, open the jar and give the lemons a squeeze to exude more juice. After a week, if the lemons are not submerged in juice, add more freshly squeezed lemon juice.
Forget about the lemons for a couple of months and let nature take its course.
Friday, November 11, 2011
Homemade Celery Salt
It's very hard for me to waste anything. I made some celery salt last weekend.
I started with a bunch of celery that had a lot of the green leaves on it.

After cleaning all of the stalks, I tore off all of the greenery. I love all the different shades of the celery leaves; dark greens, light green and yellows.
Then I dried it. I placed the leaves on a cooling rack and let them sit for several days. You can dry them in the oven as well but I wasn't in any hurry.
Once the leaves were crumbled I measured to see how much I had. This batch came out to about 1/4 cup. I mixed the leaves with the same amount of salt.
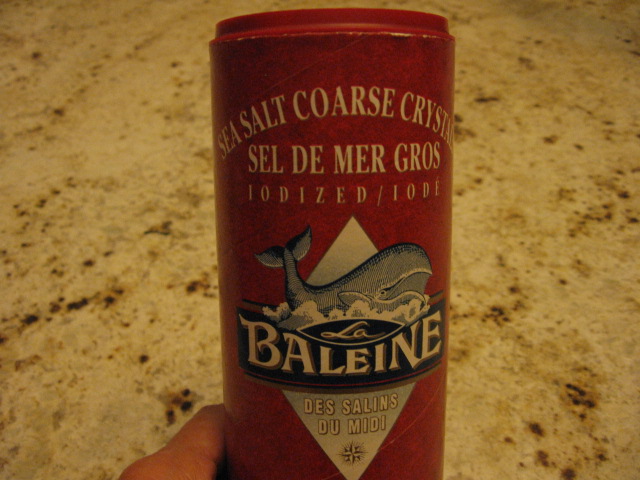
I chose this salt.
Then I tossed it all in a mason jar, ready for use!!